Olde Moon Lane Primitives
Join Olde Moon Lane on these Social Networks
  • Home
  • About
  • Whats going on at the Farm
  • Classroom
    • Upcoming Schedule
  • Blog
  • Store
  • Contact
  • Links
  • patterns
  • Gallery
  • Travel teaching options

DecoArt Paint Bottle Makeover Transformation

1/7/2020

6 Comments

 
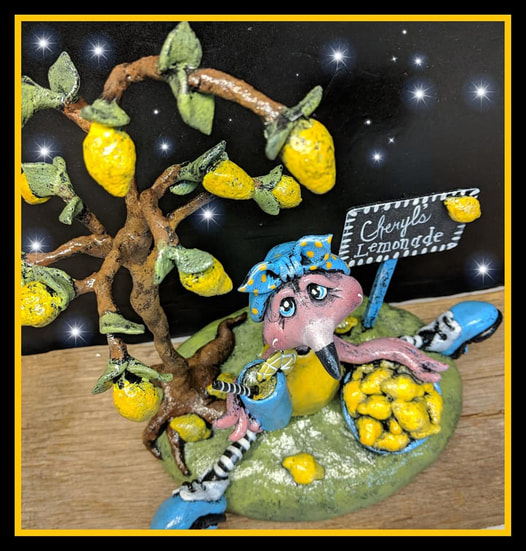
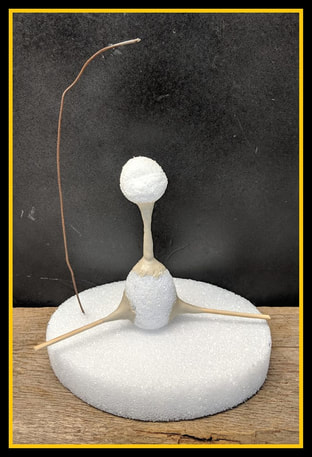
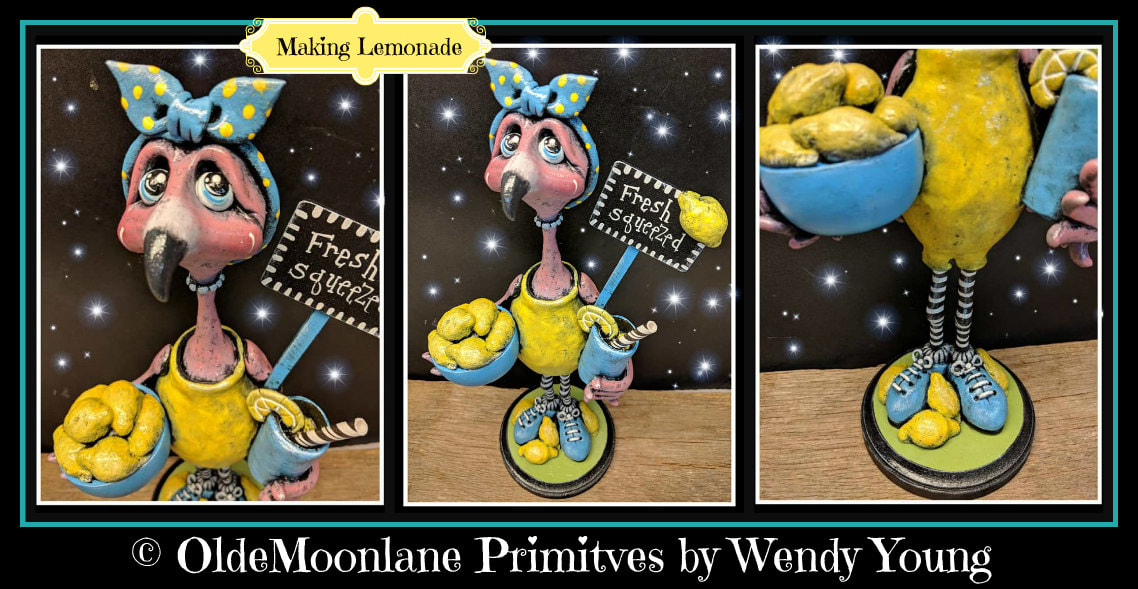
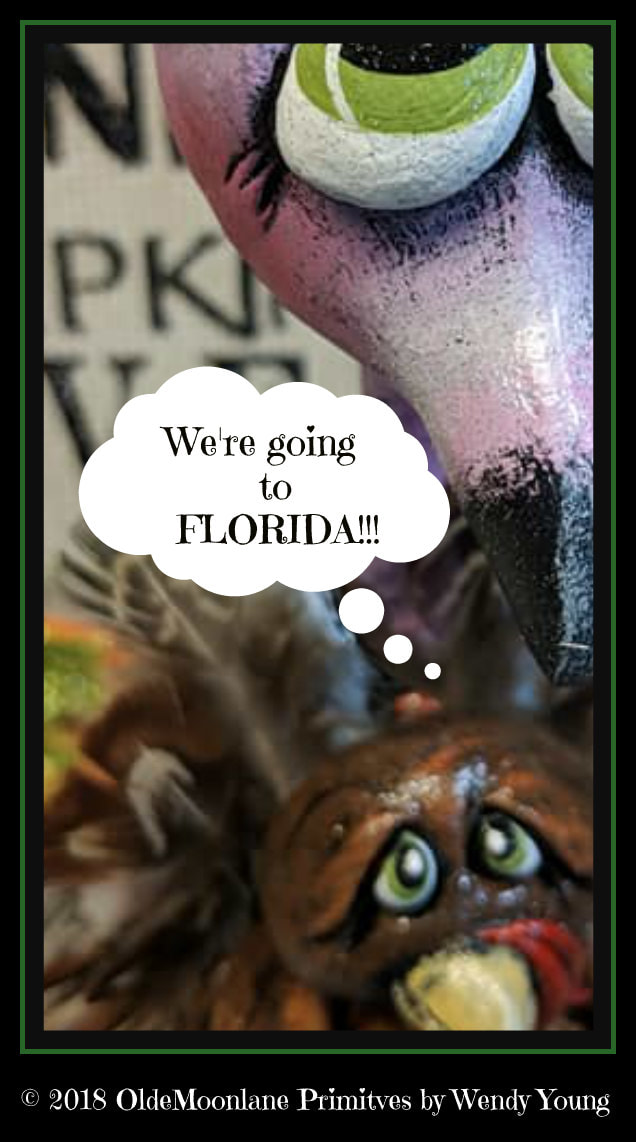
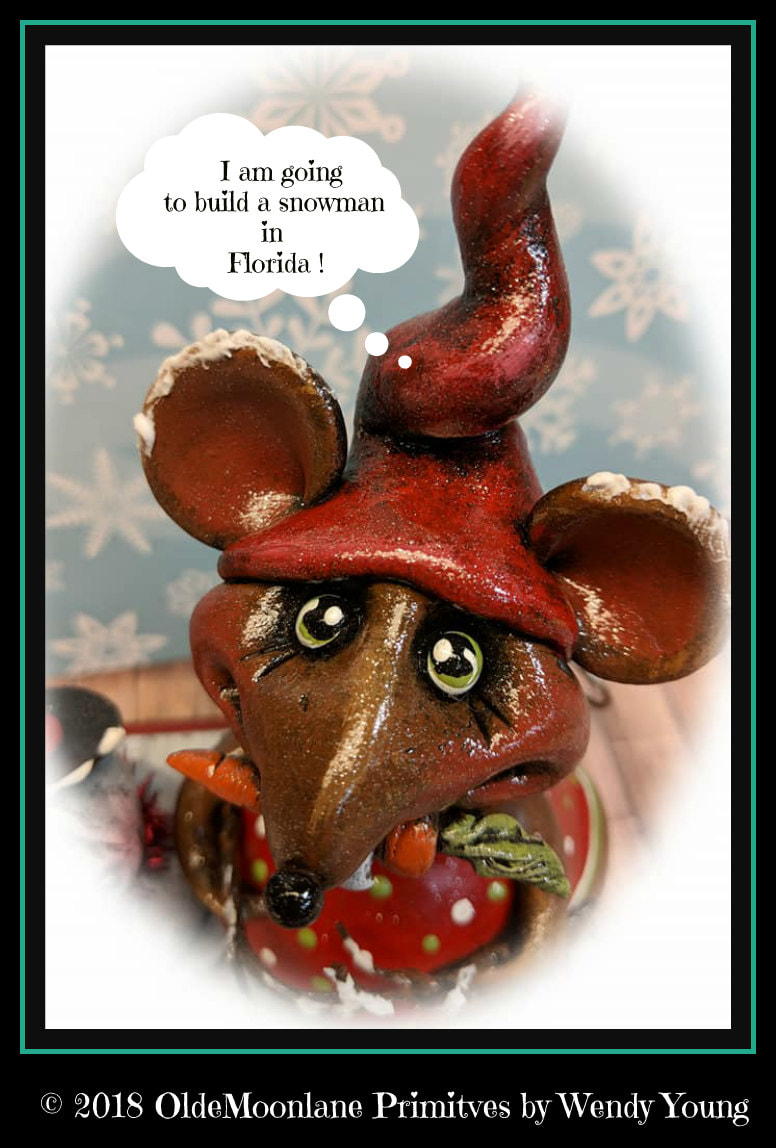
What do you do with all those empty paint bottles ????  I received a message from another artist friend asking if I ever recycled  the plastic DecoArt paint bottles when sculpting.  I have used the caps but never really  used the bottles.  Well you know me my mind was going a mile a minute with several designs using the empty bottles.   I decided to whip up a cute bunny and I thought it fitting to call her "Lil Sandy" after my very talented painting  friend Sandy McTier who suggested the idea.  Thanks Sandy!  You can be sure I will be making more in the future as I do use lots of DecoArt paint creating my cuties.  
Picture
Picture
Picture
Picture
Picture

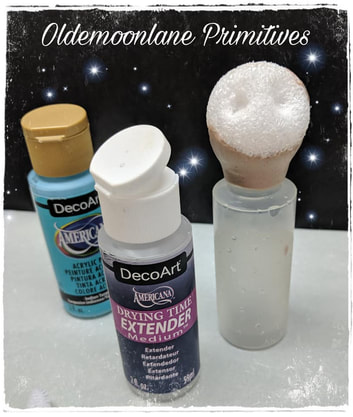
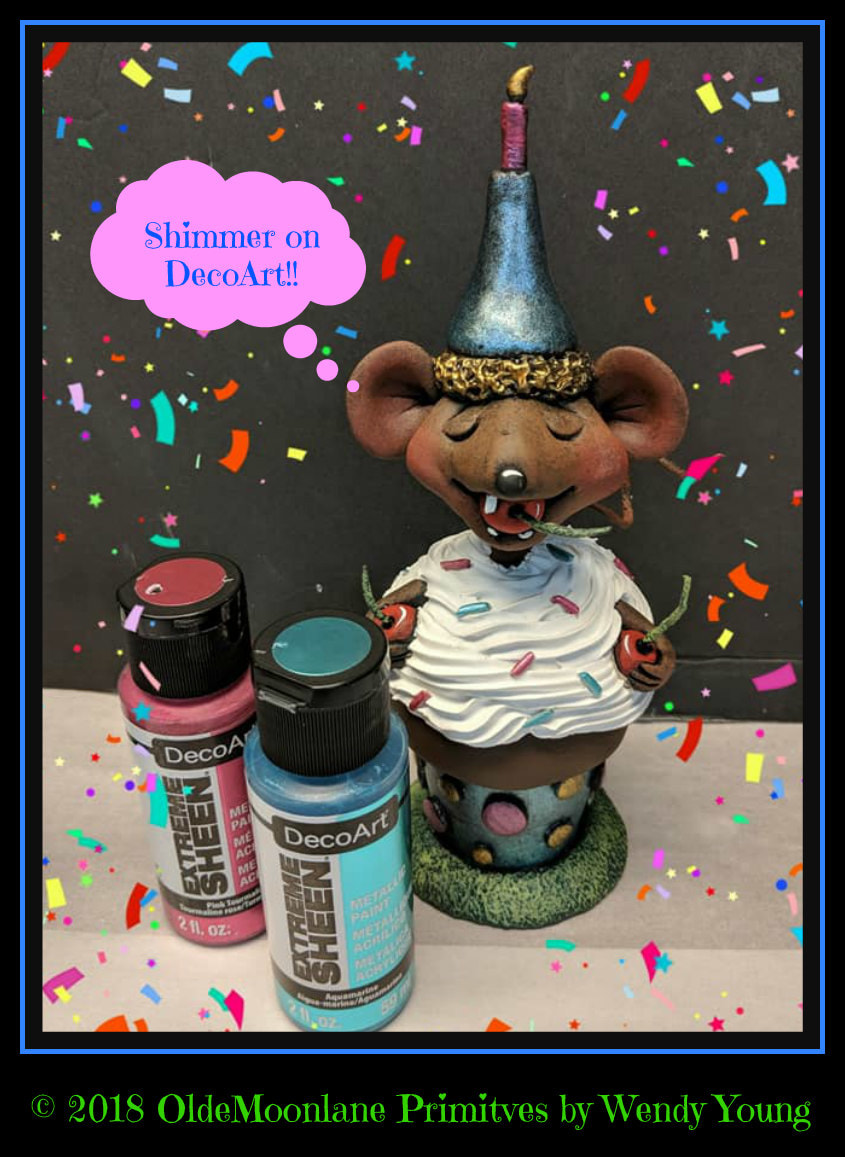
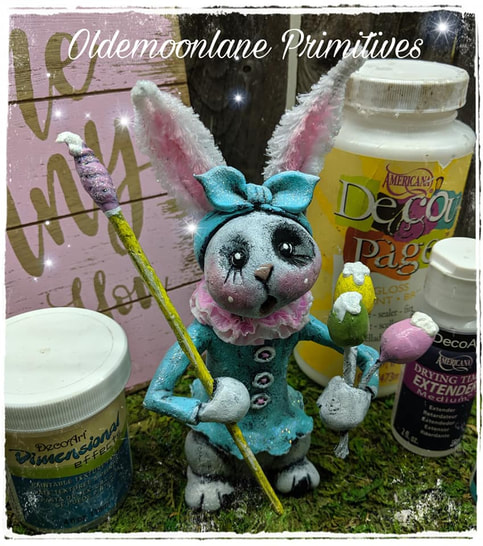
My favorite DecoArt Product to use is the Extender.  I use it as a blending medium to smooth all edges.  I have tried all different mediums and found this works best with quikwood blending.  
​
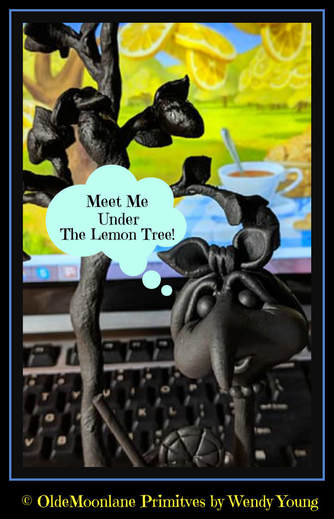
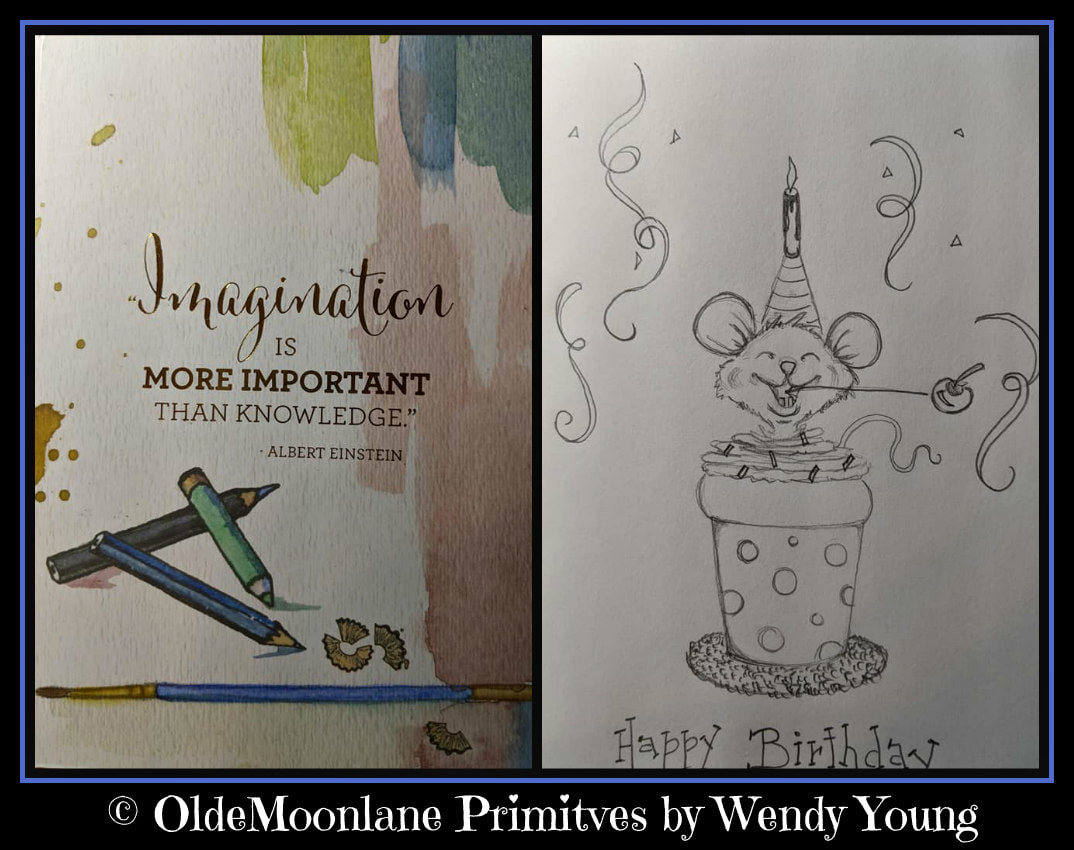
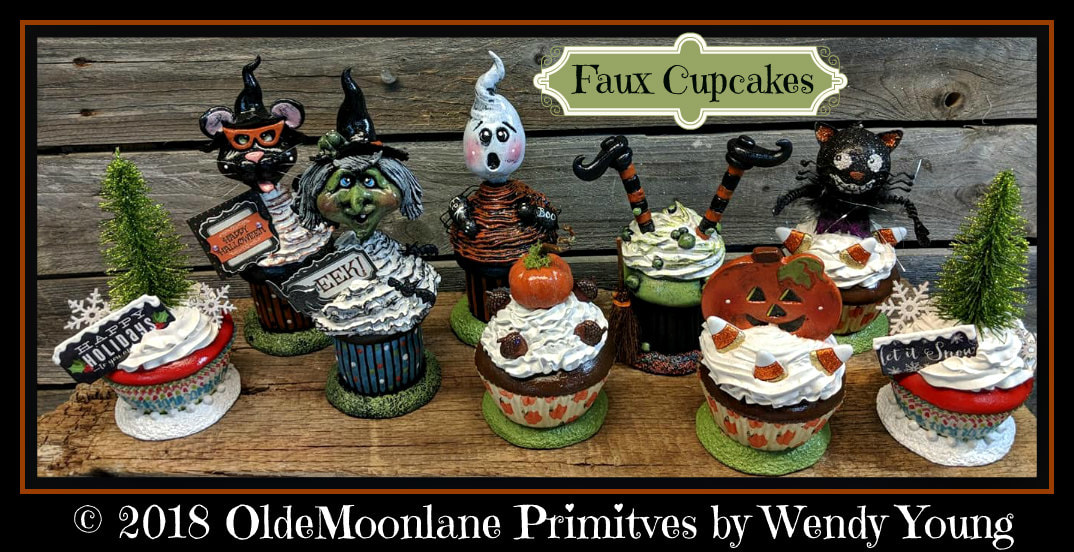
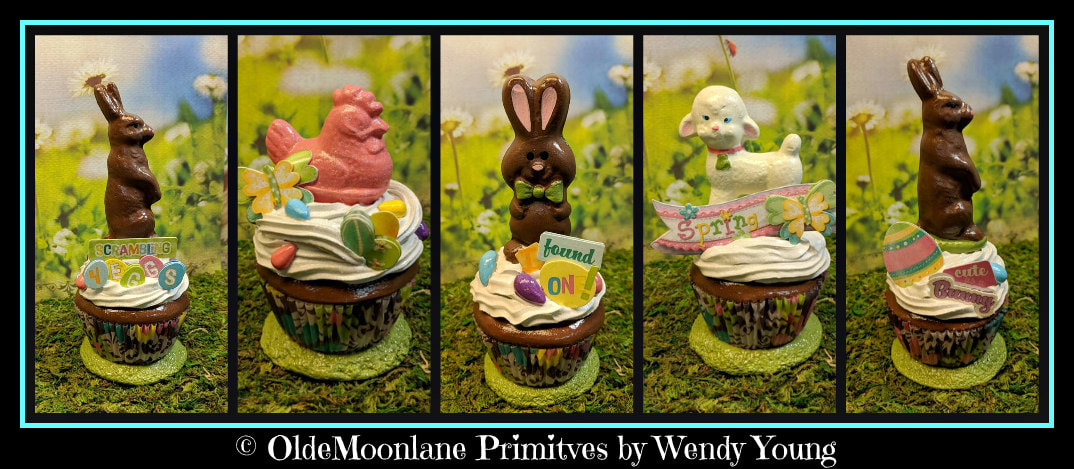
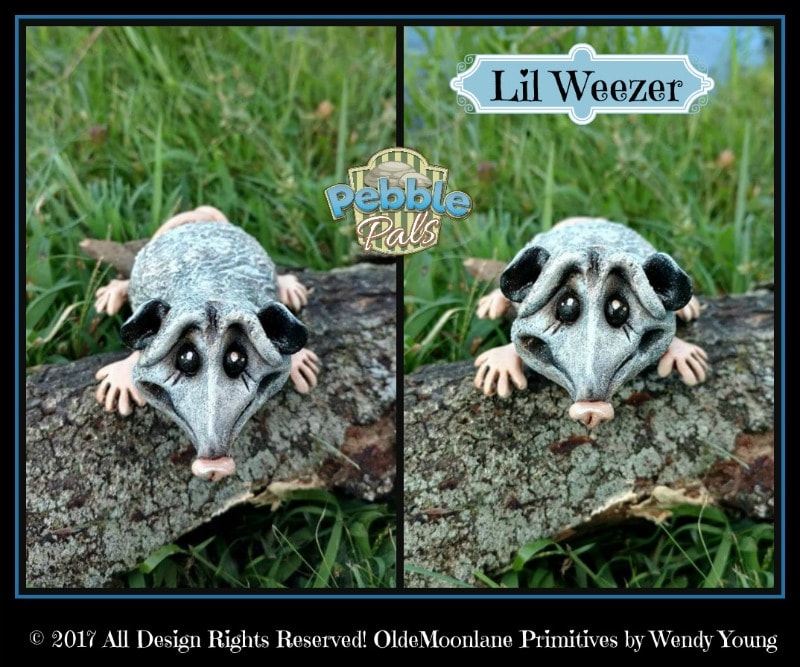
© All design rights belong to OldeMoonlane Primitves by Wendy Young
Picture

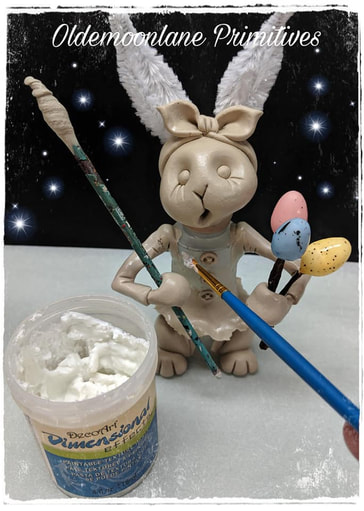
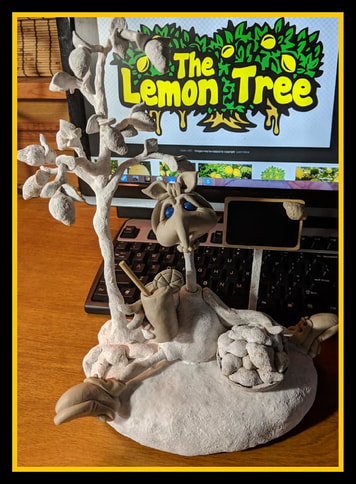
Next I  used DecoArt dimensional effects to add a texture to all of the exposed plastics sections of the paint bottle and any where I wanted to give a little dimension.   This product adheres well to plastics and then you can use acrylic paints.  
Picture

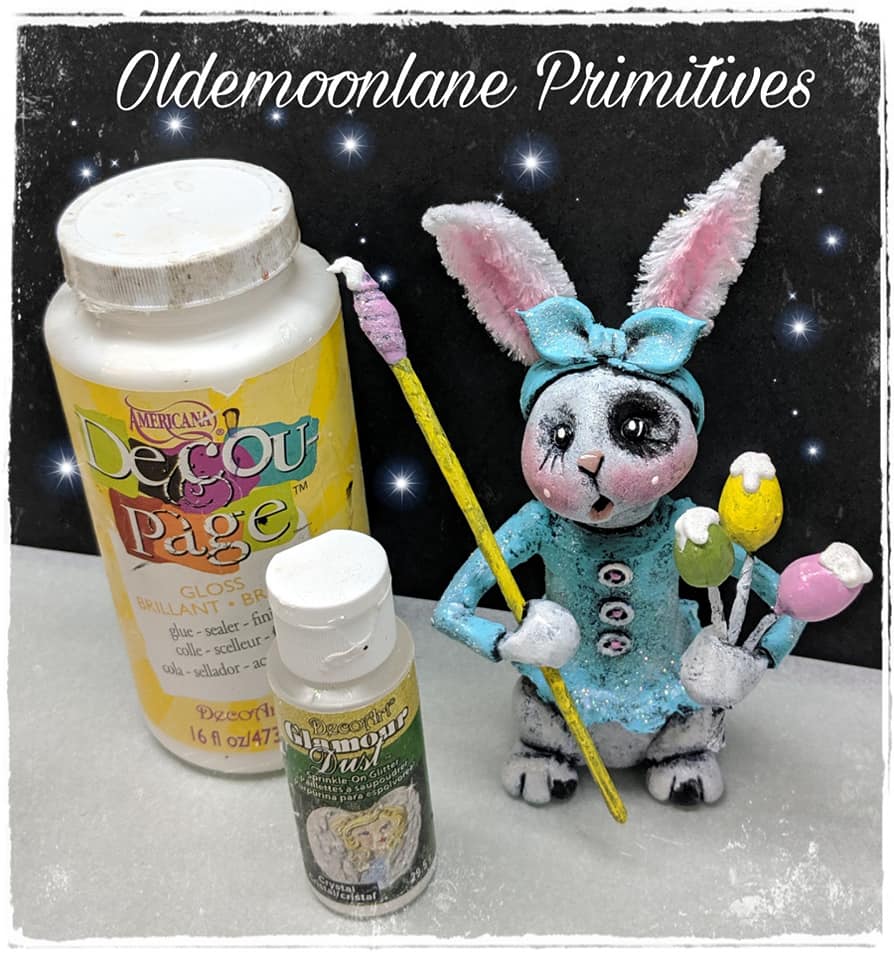
Every bunny needs a little glamor sparkle!  I used the DecoArt Decou Page as a sealer and sprinkled a pinch here and there of the DecoArt Glamour Dust to give her some sparkle and shine.  
Picture
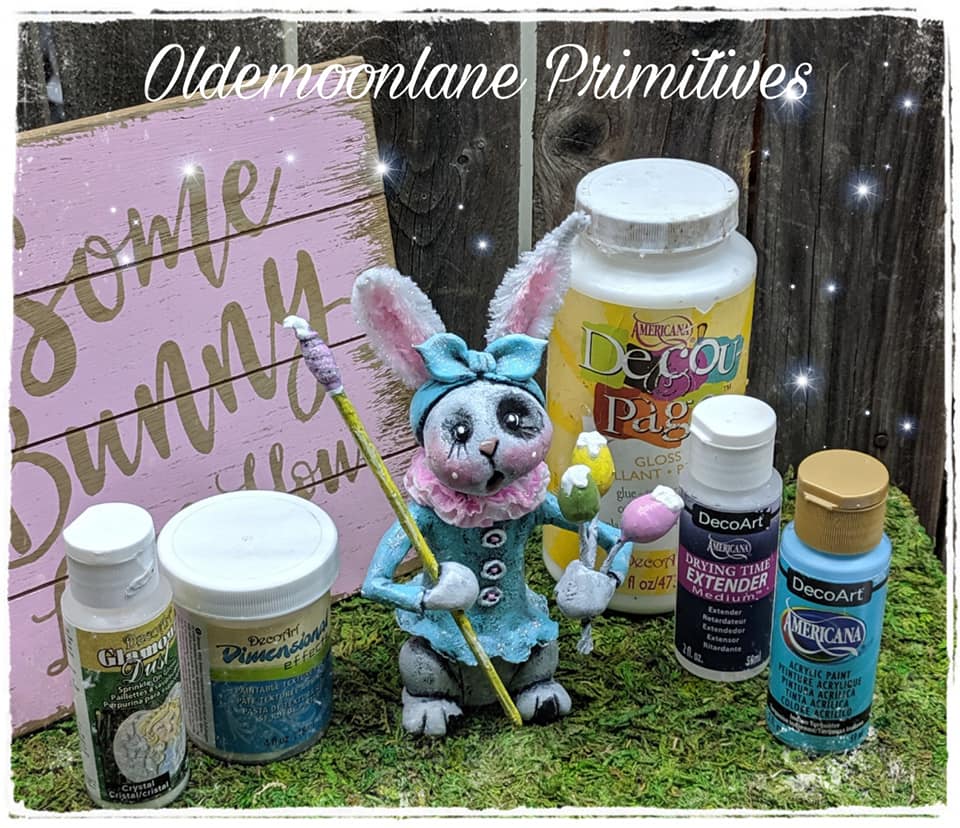
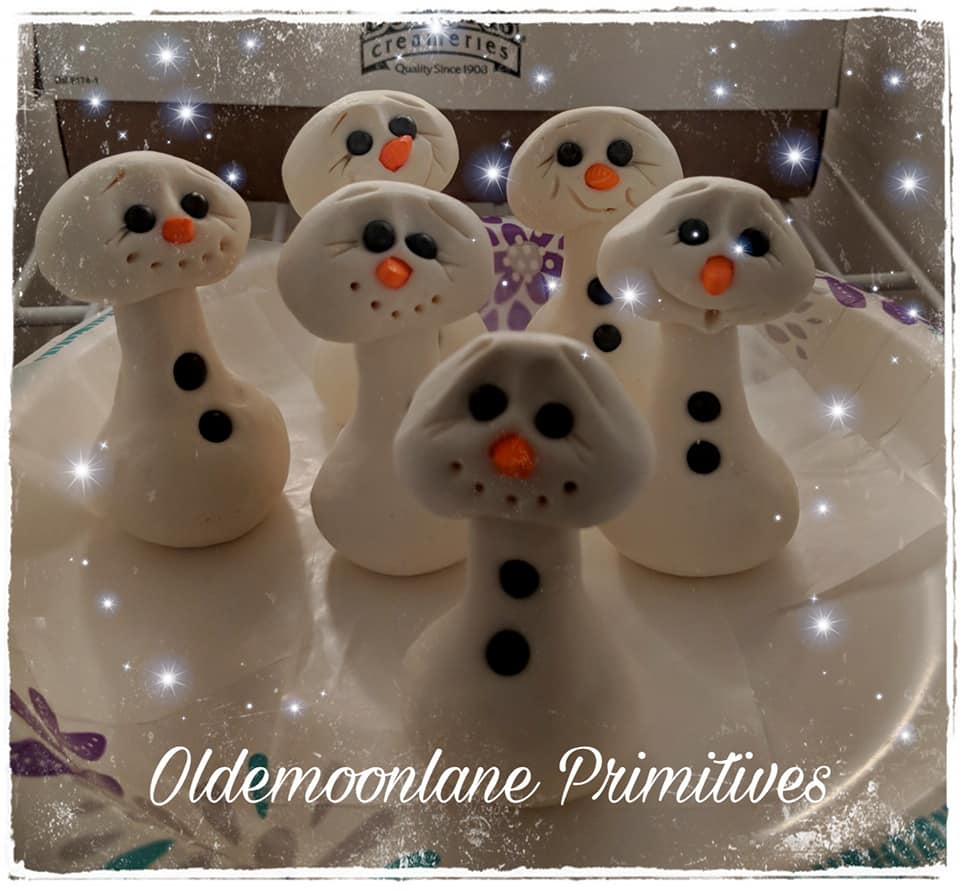
She was painted using all DecoArt acrylic paints.  You could call her a DecoArt kinda bunny!
Picture
I hope you enjoyed seeing "Lil Sandy" coming to life using many DecoArt products including the empty paint bottles.  Ohh I'm seeing piggy's Santas, Pumpkins and ghost in the near future , oh my I better get busy emptying more paint bottles.

Blessings!
Wendy
6 Comments

Pumpkins, Pumpkins, Pumpkins It's that time of year again!

8/28/2019

16 Comments

 
I can't believe that this is the first blog post for 2019.  It's been a very long journey to this point.  It actually feels good to hop on and share a little with you all!  

So many of you have messaged or commented on FB when and will you begin teaching again.  I'm starting this fall off with offering small afternoon classes of 8 in my downstairs personal working space.  You get a closeup look of my work area lol.  It may not be perfect or the OldeMoonlane Studio but I hope to make many new memories with you all.  

I rolled around many ideas and decided to use some supplies I had ready for classes last year, that had to be cancelled due to Kevin's illness and our life altering events.  

This is always a popular question this time of year for me "How do you do those plastic pumpkins??"  I have several blogs on the subject that you can scroll back on.
​
​Check out these blogs:
Sept. 23rd, 2017 blog "Skinning The Pumpkin"
Oct. 9th, 2017 Mini Buckets
Picture
Last week Kevin helped me pour (He sat on a chair and mixed with a electric drill with a mixing attachment to help stir) .  I find I'm not as strong as I use to be and this really helped with the mixing process.  
I used an old plastic dog scoop to scoop the mix from the large bucket into the smaller openings of the small plastic pumpkins. 
Make sure to tap the buckets on the ground a few times to eliminate any air pockets.  I advise you lay a damp paper towel over the pumpkin when doing this to avoid it splattering up on you.  I learned this from trial and error lol.  Try getting concrete off your glasses and out of your hair!!

Picture
This is my favorite mix to use.
You want the mix to be pourable but not watery runny.  It takes a few days for them to cure fully.  Be sure and check out the "Skinning of the pumpkins" blog on how to remove the outer layer of the bucket.  
Picture
How fun is this!!  I can't wait for you all to join me in making this fun "Pumpkin & Spice" makeover/transformation  concrete pumpkin spice.  Notice some of the tiny little air pockets, I love how they made the pumpkin more aged looking when painting.  If you have any very large holes you could filled them with quikwood.  
Picture
I'm ready are you??
Picture
Pic above shows a few of the larger Pumpkins I have done with cans inserted for flowers or ?? whatever you decide. Maybe a craggy black tree??
Picture

This turkey was done using the small buckets and made into a battery operated candle piece.

Remember it's OK to think outside of the box.  Who said a pumpkin has to be a pumpkin right!!  
​
Picture

I have a few of the bigger pumpkins poured from before and if time allows I'll be sure and share my next concrete pumpkin creations.  Our porch gets very windy in fall so these make a great porch decorations that won't blow away in the wind.  
Be sure and like, comment or share as I love hearing your feedback and if you like me to continue on with blogs and sharing .  

If you try your hand at concrete pumpkins be sure and send me a pic I would love to see yours!!!

Blessings!
Wendy

16 Comments

"Chocolate Frosties" How To!

12/3/2018

8 Comments

 
Picture
 l love sculpting in so many mediums and chocolate has to be about one of the funniest.  Who wouldn't love a chocolate snowman cupcake??  I began sculpting in chocolate many years ago (I wanted to be the next cake boss lol)  and even made and sold cakes, cupcakes etc.  I had so many request I even taught a class.  So, many have ask that I teach a class again and maybe someday but right now I thought I would share how easy it is in case you would like to make a few holiday treats of your own.   I also found out , I would  rather do it for a hobby than for a living as sculpting edibles can be stressful, especially if it's for a special occasion like a wedding.  It's also tricky, as room  temps have to be right or it will melt.  I once sculpted an entire baby shower cake with chocolate that took a week to sculpt and the heater in my shop malfunction and ran on high all night, which melted all the sculpted chocolate pieces.  I recommend when you plan on sculpting make sure the room your are working in is cool.    
  You will need:

* Vanilla chocolate melting wafers 16 oz.
* Candies of your choosing.  I found some cute black candies and carrots noses ( You       can make these with  chocolate if you cannot find to purchase. I also found some         cute snowflake candies.  
* 1/3 C light corn syrup
* Cupcake liners
* Rubber gloves
* Toothpicks
* Gel candy colorings, blue, black, pink, orange


Picture
Measure ingredients carefully, this is important when working with chocolate.  You will need for one batch of sculpting chocolate 16 oz. of vanilla wafers and 1/3 C corn syrup.  You can melt the chocolates in a double boiler or in the microwave.  Make sure to watch chocolate carefully as it is very tempermental and you do not want to over cook and seize the chocolate.  It only takes me 1 1/2-2 min in the microwave for this process.  I then warm the corn syrup in the microwave maybe 20-30 seconds before pouring it into the chocolate.  Never pour cold or cool ingredients into chocolate it will harden (seize).  Quickly stir corn syrup into the chocolate and mix till it form a ball.  (Special note- never use a utensil you just washed that is still wet, it will seize the chocolate. Make sure your bowls and utensils are dry!!)  Quickly turn the chocolate out onto a clean cool surface ( I have a marble cutting board I like to use,  remember it's chocolate and it will melt!)  using rubber gloves begin kneading the chocolate until smooth.  Place in a bag or air tight container and store in refrigerator.  I like making all my chocolate the day before I sculpt so it has time to set up.  You can color your chocolate using candy coloring gels or colored wafers.  The amount of corn syrup can vary with chocolates .  I think I use 1/2 c. corn syrup  when using chocolate.  

You can make your chocolates up to a month in advance and store in an airtight container in a cool room.  I do not recommend a refrigerator as it will produce condensation on your pieces.  


Sculpting-  Lay your chocolate out of the refrigerator about an hour or two before you want to begin sculpting. Knead the chocolate to soften.  If at any point it becomes to soft, place the chocolate into freezer for a minute.  I am constantly sculpting pieces and placing them in freezer for a minute or two while I sculpt.  It's up to you how big you want to make your snowmen but remember not to make them to tall and top heavy if you are placing them on cupcakes. Body- I used about a 1" ball of chocolate and shaped into a pear inserting the toothpick into the top. Insert two candie beads in his belly.  (Remember you can make these by coloring a tiny bit of chocolate with black candy gel.)  Head, I used about 1/2 of chocolate and shaped into a slightly oblong shape and placed onto the toothpick.  You can give him some personality by angle his head if you wish.  Insert two candy beads for the eyes.  I scored two eye crinkles on the outside of each eye using a paring knife.   I never mix tools I use with clay with food!!!  Insert a candy carrot for his nose or make one using the chocolate.  Mouth- you can use a tooth pick or a paper clip.  I did a variety.  I like them all to have their own look.  Place them in the freezer on a paper plate or wax paper while you prep your other colors and to just make them sturdy!!

Cheeks-  I used a pink food gel to give his cheeks a little color and used a dot of white food coloring on each cheek this is optional as you may not have these supplies on hand.  

Mixing colors-
​
It is really hard to make black using the vanilla wafers, you can get a darker look by coloring chocolate to black or just buy black wafers if you can find them.  I always wear gloves for this process!!!  Using a toothpick I placed a large amount of the black candy gel on the chocolate and knead till and even consistency. .  You will want to do this process for the blue as well.  
Hat- Flatten and tiny ball of black for the brim and place on top of the snowman's head. Make a slightly smaller blue ball and flatten slightly, place on the top center of the hat brim.  Top of hat you will make a upside down pear shape placing the smaller end on the top of hat and press slightly.  I placed a candy snowflake on each hat.  
Picture
Scarf-  Roll a piece of the blue chocolate long enough to wrap around the neck and join where you you want to add the scarf tails.  Make two scarf tails one slightly longer than the other and using a paring knife cut fringes on the ends.  
Picture
Icing-  This is my favorite go to Buttercream recipe!
​
1/3 C Crisco
1/3C Butter (room temp)
3C 10X (powdered sugar) sifted
1/2 t pure clear vanilla
3T whole milk

Cream the crisco and softened butter together, gradually add the 10X sugar 1 cup at a time.  add the milk and the vanilla nd whip till smooth and creamy.  You can store in a air tight container if you want to make ahead.  
I piped the icing on the cup cakes and sprinkled them with clear cupcake sprinkles but the sprinkles are optional if you do not like.  I love sparkly sprinkles.  
Picture

I made my favorite chocolate cupcakes but you can make whatever flavor you wish.  (secret family recipe lol) 
​
Picture

​Royal Icing-  You can look up any recipe for this or just buy the already made cookie icing.  I pipes it on the top of the hats to look like snow.  

Picture

I knew I was making the cupcakes to take and give to Kevin's staff at physical therapy, so I didn't want them to have to worry with returning a container.  I took a shipping box and cut it down .  I then covered  it with some pretty snowman christmas paper, lining the bottom with foil.  Presto instant container.  I then used the clear food wrap I found at the dollar store with snow flakes to wrap up around the box add some curly ribbon and a tag.
Picture


​Be sure and store in a cool room!!!

Picture


All wrapped and ready!
​

Picture
Picture
I hope you enjoy making some frosty chocolate snowman cupcakes for friends and family and maybe just as a random act of kindness.  They will be sure and bring a smile to those you love, and their tasty too!!!  Just be sure and warn everyone there is a toothpick inside!!

Blessings !
Wendy

8 Comments

Meet Me Under The Lemon Tree

6/13/2018

5 Comments

 
Picture
A few days ago I posted "Pinky" making Lemonade from Lemons.  I love sending random acts of kindness and decided to try and pay it forward to others the only way I know how.  I plan on as time goes by creating and sending special pieces to those who may need a smile and are having struggles. I knew the moment my friend whom I have never met in person but became friends through FB and our love of creating commented how much she loved Pinky and her Lemonade, that I was going to create a special piece for her.  My friend Cheryl has been facing her own battles this year and posting about her journey with much grace.  I know what people don't often see is the bad days and challenges many face with an illness.  I have held many hands of those over the years who need comfort and love.  Cheryl has blessed me a few times with her scrumptious cookies in the mail and brought a smile to my face and my stomach as I do love a good cookie.  You can find her on FB under "Under The Lemon Tree" business.  So, Cheryl this is for you my friend and I hope when you receive this creation you will know I thought of you every minute I worked on it and offer my many prayers for you on your journey.  Hugs to you!!!  
​
Picture

This is how it all began.
​

Picture

Yes it was all sculpted using quikwood.
​

Picture

I think I would love a Lemonade under the lemon trees!
​

Picture
Picture
Picture
Picture

Once again thank you to everyone who has blessed and continues to bless our family in troubled times this year!  Go out and share some compassion and kindness today !
​
Wendy

5 Comments

Pinky Says "When Life Gives You Lemons Make Lemonade".

5/30/2018

11 Comments

 
Picture
Picture
Ever wonder why life throws you so many lemons ??  This has been a hard week this week and I had a really good cry.  A FB friend recently said to me she knows how I am making Lemonade from so many lemons and she would be right.  I decided to turn our sadness and challenges we are facing into something fun, whimsical and positive.  Don't get me wrong we have many days that this is a great challenge for us but in life we can either choose to stay stuck in the negative or try and swim our way above it.  

I like creating little stories with the pieces I create, as they really do come to life as I am creating them..  I think it gives them a personality, either that or I have a really crazy imagination.  Hmmm you guess!!  

A few months ago I introduced "Pinky" the flamingo who wanted to become a famous mermaid act in Florida and was excited to be traveling with me to Florida this year.  Well, those plans fell thru and she was adopted by a very lovely lady in Florida.  I recently learned Pinky's plan haven't been working out quite as she had hoped and she is just working in the lemonade stand making "Lemonade from Lemons".  If you get to Florida and see Pinky be sure and tell her not to give up on her dreams and try one of her famous Pink Lemonades. 
 

Picture
Picture
Picture
Picture
11 Comments

Filling My Spirit With Joy!

5/19/2018

22 Comments

 
It was good to finally sit at my sculpting table in the early morning hours yesterday.  It felt like home, my soul was filled with Joy even if it was only for a short time.  I have always used art as a way to heal the spirit.  If you have read my ABOUT section of  the web-site then you know how important art has always been to me.  It's a way to escape into a world where you can create from your imagination.  My secret place to escape.  It's kind of like reading a good book and escaping into the pages.  
Picture

I knew my time was limited ,so I just worked on a base I had already started.  I originally wanted to sculpt a Santa on the base.  Fall is my favorite season , so "Spiderella" came to life.  Her messy Italian hair complete with spiders is looking like my hair these days.  She has already found a forever home in sunny California.  

The wheels are just turning in my head again and I can't wait to get back to the sculpt table.  It will be slow going as most of my time in the day is used taking care of Kevin and all the appointments, paperwork etc..   He is headed for a procedure first week in June and Surgery is now a go for second week in June.  Please continue your prayers as we continue this journey. 
​
Picture
In January I would never have guessed how our entire life  completely change changed in a moment.  The year started off with such excitement as I was going to finally really start journing out with travel teaching.  So, many exciting classes were scheduled and I was so humbly honored that so many wanted me to come teach.  I was heartbroken to cancel my travels for the year and felt I left so many people down.  I am hoping one day I can resume that dream but for now I am right where I want and need to be beside the love of my life.  He has been the biggest supporter of me and he is the reason I am doing what I love to do for without his nudging this shy girl would still be sculpting away in private.  I even bought a video camera system the week before this all began to do videos for online classes.  I never even had time to get the packaging off .  I was going to return it but I figure if I can't travel teach at the present maybe now is the time to do the videos.  

Be sure and check out the Florida Gourd society web-site as Semla and Peggy will be still teaching some of my designs with my blessing.  I wish for everyone to have a good time.  I will be there in spirit.  I am working on two patterns for them for the retreat.  Once I am finished with "Pilgrim Pete" and "Corney"  I will then begin typing the pile of projects I have photographed for pattern releases.  

Picture
Picture

The reason for this blog post is I want your vote!!  I would like to know which project/projects you would like to see next as a pattern release.  

​Please leave a comment on this blog post to cast your vote as to the next pattern I will work on.  


​Blessings to everyone as you have blessed me this year in more ways than I can count.  I hope to continue to use what gift I have been given to bring smiles to all.

Picture
22 Comments

Next Chapter

5/9/2018

26 Comments

 
I have always thought of life as a book of chapters.  Some chapters are good and some not so and we would rather skim by them.  I'm not very fond of this chapter at the moment but I still try and find things each day I am so thankful for.  I am forever grateful to those who have reached out to us in this difficult time and I will promise to spend my life paying forward all the kindness shown to us. 
​ 
Picture

Kevin has been home 10 days now with a long road yet to go (Several surgeries needed when he is stronger) but with the help of our faith , family and friends we are determined to keep fighting. He fights to learn how to walk all over again and probably will never gain back his hearing loss but his vision has slightly improved and we are hopeful maybe someday it will .   Our life has definitely taken a major turn but who knows, maybe the best is yet to come.   We love spending time together and enjoy creating together.  Kevin has always had a job that he had to travel all of our married life ,so I am going to spin this around and make this a blessing instead.  We get to be together everyday.  

You never realize how drastic a life altering event can change everyday living.  Now you have to plan everything.  Even a simple car ride to a Dr. appt.  I never realized how much we lack in handicap accomidies.  We will adjust with the new normal in time.  
Picture
This month marks our 33rd Wedding anniversary and we plan on making the rest of this chapter worth looking back on .  It's the hardest of times in life that make us stop take a breath, look around and enjoy the beauty in small things.  
Picture
Picture
30 Yr Anniversary Pigeon Forge 
The Day We Got Married May 1985
Picture
  NOW!  Still hanging in and we are going to spend the entire month celebrating our 33 year together.

It's been several months now since I have picked up my sculpting tools and paint brushes , but today I plan on creating.  It's time to seek healing for the soul.  There are many ways to be creative in life and its not always with a paint brush.  I plan on creating with laughter, smiles and just the joy of being.  Ohhh I might try and sneak some clay in today , if I am able, as it has always been a way of comfort and healing in troubled times.  I had a lot of time to sit in the hospitals with a sketch book in my hand and it's time to be creative again even if only for a few short minutes a day!   I can't wait to get back to creative blogs.  

Take time today to stop look around and be thankful to just be.  I'll be in the new hammock our son bought for his dad.  Now the trick is once I get him in it , how do I get him out of it??  If you drive by and see us on the ground you may need to stop and help me get him up lol!  See laughter is good for the soul!!! Paint the skies in laughter today!
Blessings!
​Wendy  
Picture
26 Comments

Party Boy gets his Extreme Sheen on!

2/15/2018

6 Comments

 
Good Thursday morning everyone.  I hope everyone has recovered from the holiday of Love?  I think I ate an entire dozen of chocolate covered strawberries myself.  You can't just eat one!!

So many happening in the OldeMoonlane FB friends group page , as I shared "How I Create" with them the other day, as this seems to be a question I am ask so many times.  I thought I would share with everyone.  My day consist of not much sleep YA DA YA DA I know I repeat this but it's factual .  I have so many images running thru my mind at any one given time that I sketch all day long.  I sketch as I am creating as well.  My parchment paper work surface everyday is usually covered in sketches.  I carry a sketchbook in my purse to sketch when I am out and about as I like putting my ideas on paper.  I literally have piles of hundreds of sketches that may never come to life but they are there for days when maybe you get that creative funk.  If you find you lose inspiration on any given day you can always look thru the sketch pile.  

My sketches are just that quick 2-3 minute sketches just for quick referencing.  They not need look perfect.  I love seeing a simple 3 minute sketch pop of off the paper and come to life in 3-D as that's how I see images.  I don't know if being mildly dyslexic (This is why my grammar and typing is not perfect but I try) is how I see things , but it took me a long time to realize not everyone sees the same images.  

My friend Jane gave me this wonderful sketchbook .  I love the quote on the cover as it suited me to a T.  I have always had a fantasy imagination that started when I was young. I shared with the group members this quick little sketch inside the book , since I'm on a cupcake making roll lately.  Now who doesn't love cupcakes!!  This is not a perfect drawing just a sketch of a idea to create.  I decided since I shared his sketch ,he really needed to come to life.
Meet "Lil Noodles"  Party Boy!!!!
Picture

Next I shared yesterday in the group "Party Boy" getting painted .  Notice his party friends in the background?? 
​

Picture

The pic above is a WIP and he has a Cherry in his mouth and two in his hands as it is his birthday and your allowed as many cherries as you want on your birthday!
​

Picture

OHHHH I am loving my new "Extreme Sheen DecoArt Metallics"!!  I really thought he needed to be all dressed up and shimmery for his birthday!  I base coated with black and applied the Sheen with a dry brushing technique.  Don't you just love how he shimmers??

Picture

Now a party is not a party without a few friends!!
Picture

Hope you have enjoyed the makings of one of my little sketches and don't forget to shimmer and party on today!
​
Blessings!
Wendy

6 Comments

Busy Busy @ OldeMoonlane

2/12/2018

5 Comments

 
It's been about three weeks since my last blog post.  It's a busy time of year @ OldeMoonlane as I am prepping projects for travel teaching and for teaching here in the studio shop.  My blog post will be here and there over the next month or two until I get caught up with projects. (I promise I will be back at it)  In between projects, I do still make and create for those who like to collect my creations.  You can always find those in the etsy shop.  Missing my post and items and happenings here @ OldeMoonlane ??  Feel free to join the OldeMoonlane Friends FB group page where I actively post there. 
​
Keep watch on the class schedule as I am still watching the weather for pop-up make and take Sunday afternoon classes.  I was ask "would I do another "Cupcake" class" and YES I will ,just keep watching for the class listing.  Here in PA the weather can still be very wintry up and into April, so I watch the weather on a Monday to see if it's a go for a Sunday pop-up class.  Last class filled up quickly the same day I posted so don't wait to register if you want in on the fun.

I will be listing more classes for the year for here at the studio .  I'm just trying at the moment to get all my projects lined up.  Lots are photographed and ready to go.  I am also trying not to overload myself.  

​
Picture
 
​Next pop-up class is this Sunday!!!  We will be creating "Sleepy Hollow".  I checked the weather and it's a go as we are to actually have a nice week.  To find details go to the class schedule section of the web-site.


Picture


I am teaching a 3-Day seminar  July 13th, 14th and 15th @ Steph's Folk Art studio here in PA.  We will be making all three projects, the pilgrim couple and the concrete turkey.  Please contact them to register, as I would love for you to join us.  Please don't wait to register as there has been a lot of buzz for this seminar.  
​

Picture

The OldeMoonlane Primitive Friends group members have already had sneak peeks of  "Pinky" the raffle/Prize give-away I created for the Florida Gourd Society retreat this Sept.  So, far I have 5 projects created to teach at the retreat.  "Pinky" is so excited to be coming to Florida and she hopes who ever receives her helps her full-fill her life long dream of becoming Sea World's first pink flamingo mermaid act.  Hey a girl can dream!!  
​Details will be listed sometime after April on the Florida Gourd Society page. 

​
Picture
Picture
Here are the Sneak Peeks of the five projects for the retreat.  There is something for all skill ranges from beginner to advanced.  I am so looking forward to the retreat and hope to see you all there.  Please stop and say HI to me and introduce yourself!  It's always nice to meet someone in person.  
Picture
Picture
Picture

Picture
I will be teaching again this year back in CA as they have ask me back woohoo.  I so enjoyed my time last year in CA with a Fantastic creative group.  I will be teaching a birdhouse gourd project and project selection is narrowed down to two just waiting on my gourd supplier to gather in gourds for the year to see which is a go.  We will also be sculpting a set of 3 ornaments.  Ladies I am so excited to be joining you again!!!!!!!  So I am busy preparing for this seminar as well.

I have several Pixelated Palette projects coming out this year, so if you don't subscribe to this online artist publication you may want top do so.  I haven't started the projects yet but they are on my list to get to very soon.  Keep watch .  
​
Picture
This is a picture of one of last years issues I was included in.  Can you pick out my project??  

Starting today have listed a few pattern packets on sale in the etsy shop with a 15% discount.  This year as I post new patterns in the shop, I may start discontinuing older patterns from 2016 and replacing with new patterns.  So, if you see something you may not want to wait to get as it may be discontinued.  

https://www.etsy.com/shop/OldMoonLanePrimitive


Picture

This morning I listed a few new cupcakes in the coming soon folder of the web site for a future etsy day sale.  I have not picked the date and time yet, but I will be sure to announce when the next listing is.  You can see the individual pics in the coming soon folder.  I'm liking the witch one the best of this grouping.  

Picture

​This is the pic I posted the other day and received an overwhelming amount of messages.  This will be the next pop-up class.  You will get to pick your topper but note the doo-dads are supplies I had on hand.  I have a variety of doo-dads you can pick from,  they may not be same as in pic.    Keep watch for this next cupcake pop-up make and take class (No Pattern).  Fun Fun!!!!

I am also adding this message to anyone who has e-mailed me.  If you have not received a message reply please know I have tried but a lot of my messages lately I have replied to or sent out keep coming back as mail failure error.  I am not ignoring your messages.  You can always try PM ing me on FB as well.  I always try and respond promptly to all messages so know if you haven't heard from me try again.  I appreciate you all.  

I hope you have a blessed week!!  
Wendy

Picture
5 Comments

My © Pebble Pal 's First Ever Pattern Release!!

1/19/2018

7 Comments

 
It's been a few years now since I first introduced my © Pebble Pal creations.  I received such an overwhelming response from them and I couldn't make them fast enough.  I thought I would share how my idea came about.  I was lounging in the hot tub on a early spring  day when I was watching my husband and son put down Rock/Pebble landscaping around the house.  I kept seeing all these shapes and figures in the pebbles.  It was that day I began sculpting my first creation.  
​
Picture

You didn't think I would post a pic of me in the hot tub did you??  LOL!  
​

Picture

​On this particular day we went Pebble hunting at our local amish nursery here in PA. I didn't want to keep robbing the ones out of the flowers beds.   Oh it was like being in the candy store. 

​I like sending a little something special in all of my packages for those who purchase my creations, so we went to Mr.Ed's candy store and picked up rock candy to send along with the pebble pals.  If you have never had one they are all sugar!!!

​
Picture
Picture

I wanted to have a special logo just for my "Pebble Pals" creations so I had Jeremy Ruby a local graphic designer create one for me.  He  also designed my business logo on the right.  He is a very talented designer and if you need any work done just send me a message I would be glad to give you his contact info.  
​
Picture

The picture above is the first "Pebble Pal" creation I believe I ever posted online.  Yes, believe it or not they are made from rocks/ Pebbles.  These make the cutest paper weights for on your desk or just to sit around.  I made the larger version at the time for someone who ask if I could make a bigger one.  I wouldn't want to ship the larger ones as the weight of the large rocks would cost a fortune in postage.  
​

Picture
Picture
​
So, to date my Pebble Pals are the one creation I have kept © and I have not released any patterns.  I had so many ideas with these.  Do I license them??  Do I make a book??  or simply do I share and start making patterns??  
​
​I have decided to share my first pattern and it is a very special one.  "Lil Weezer"  named after my grand daughter who loves possums!!  Also, Possums were the start of my art career when I won 1st place of a drawing and her mother possum in elementary school.  I thought it was fitting this be the first ever "Pebble Pal" release!!  

Here is the link to the listing for the Instant download pattern only!!
​

https://www.etsy.com/listing/573789828/lil-weezer-pebble-pal-instant-download?ref=shop_home_active_1
​

Picture
Below is a pic of just a few of the Possum  © Pebble Pals I made last year.  I believe there may be 2 or 3 of them still in the etsy shop.  They do make great paper weights!
https://www.etsy.com/shop/OldMoonLanePrimitive…
​

As always!
​© 2018 OldeMoonlane Primitives by Wendy Young All Design Rights are reserved!  I give permission to create  items in pattern form only
!  Thank you for respecting my wishes!

Picture
Just a little slideshow of some of the past "Pebble Pals" I have created.  © OldeMoonlane Primitves
I hope you are excited as me at the first "Pebble Pal" release. 
 Enjoy and Happy Creating!

Blessings!
Wendy

7 Comments
<<Previous
Forward>>
    Picture

    Hi and Welcome to OldeMoonlane Primitves.  My name is Wendy Young and I am happy to have you join me.  I am a wife of 37 years, mom of 2 and grandmother of 3 .  I have been creating for well over 35+ years and I started this blog to maybe offer tips /tricks and happenings  at Oldemoonlane.  

      Please enter your e-mail to follow and receive updates and notifications.

    Follow

    Archives

    May 2022
    March 2022
    October 2021
    December 2020
    May 2020
    April 2020
    January 2020
    August 2019
    December 2018
    June 2018
    May 2018
    February 2018
    January 2018
    December 2017
    November 2017
    October 2017
    September 2017

    Picture
    Picture
©2013 Olde Moon Lane Primitives