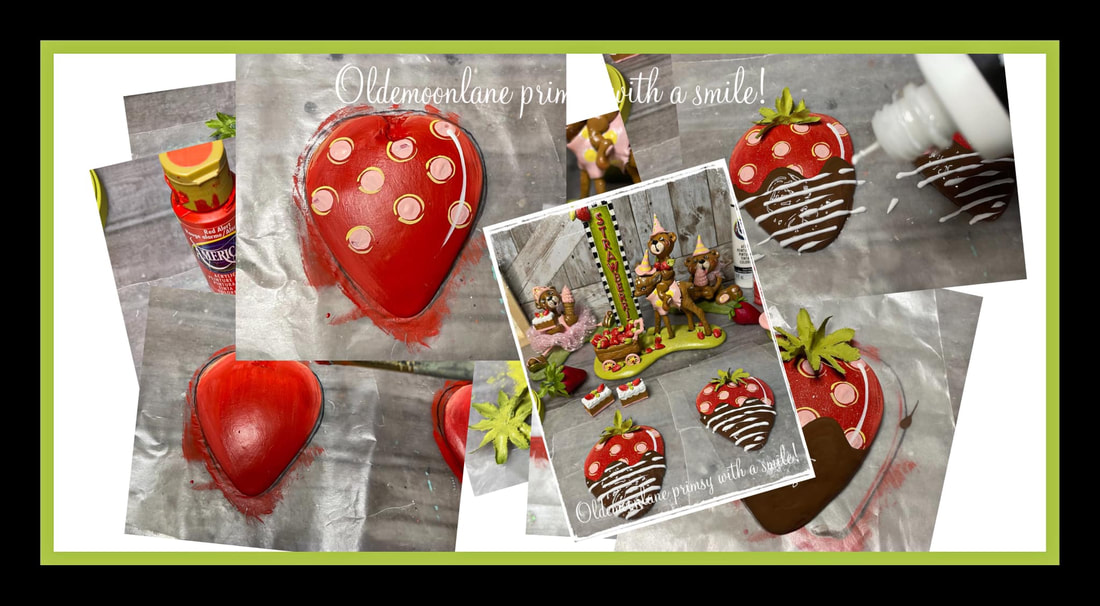
My mouth was watering the entire time I was creating these faux chocolate covered strawberries! This is just a fun quick project that any beginner can do no fancy sculpting or painting. They can be used as simple bowl fillers, magnets or accents to other creations.
OldeMoonlane designs are © but I do give permission with my tutorial pieces (ONLY) to be created for personal use or pin money/craft shows. Mass production or teaching of OldeMoonlane designs/techniques is prohibited. This is a Free project for all that I give from my heart please just share link to project if you wish to share it.
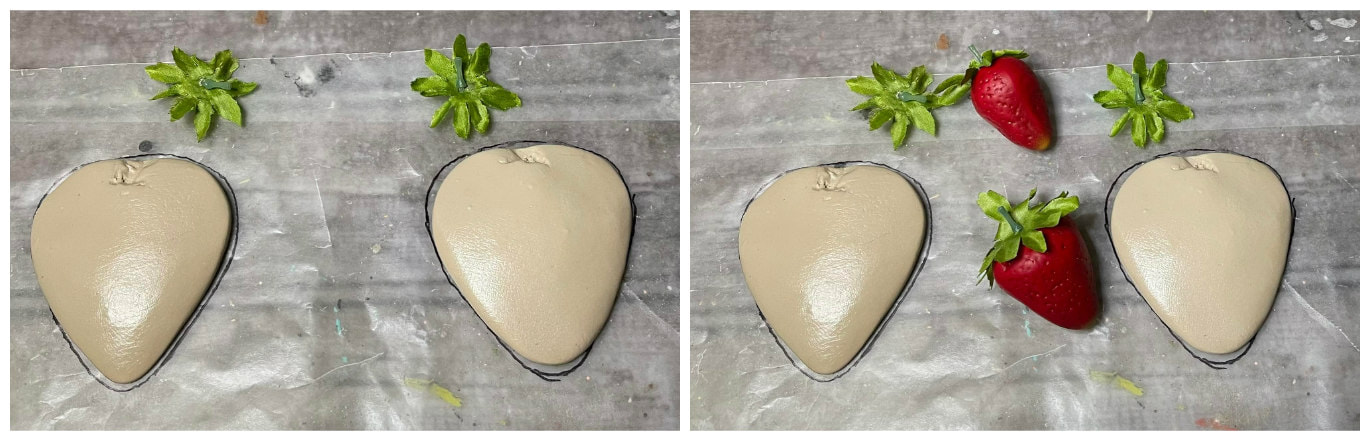
You will need (1) 2oz tube of quikwood per (2) strawberries. (Or your choice of sculpting compound) I drew the shape I wanted on a piece of parchment paper. Knead the entire tube of quikwood until well blended and use 1/2 for each strawberry pressing and shaping on the parchment until desired shaped is achieved. I took the stem off of actual artificial strawberries I purchased at Hobby Lobby and inserted them in the top of the berries and then laid them aside until the quikwood cured 20/30 minutes. (You could also make your own leaf toppers). I just liked the look of the different texture.
Note: On occasion I do sell quikwood in my etsy shop. It is getting harder to get my orders as last time it took 2 months for my shipment due to supply shortages. You can also find it online or in hardware stores. I recommend you use a different sculpt compound if you are allergic and you wear gloves and a mask when using quikwood due to fumes. Not everyone can use it.
Note: On occasion I do sell quikwood in my etsy shop. It is getting harder to get my orders as last time it took 2 months for my shipment due to supply shortages. You can also find it online or in hardware stores. I recommend you use a different sculpt compound if you are allergic and you wear gloves and a mask when using quikwood due to fumes. Not everyone can use it.
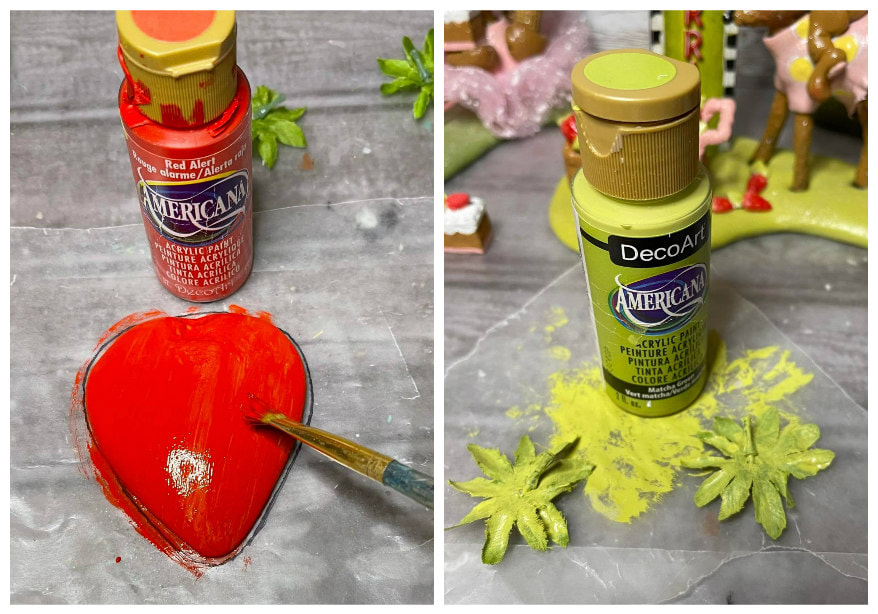
Paint (2) coats of Red Alert acrylic paint or your choice of red on each berry and let dry. Dry brush the leaves with Matcha Green or your choice of green and let dry.
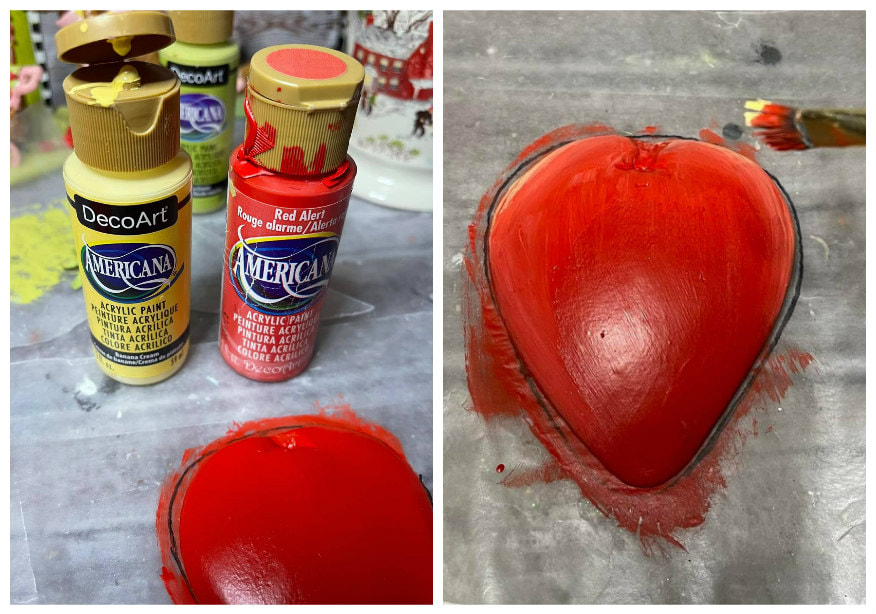
Give the top of each apple a highlight of Banana Cream (yellow) and let dry.
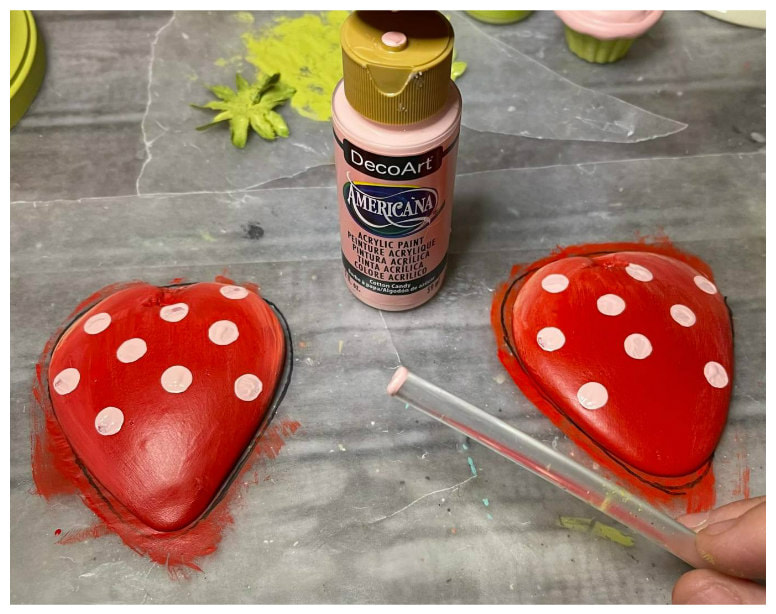
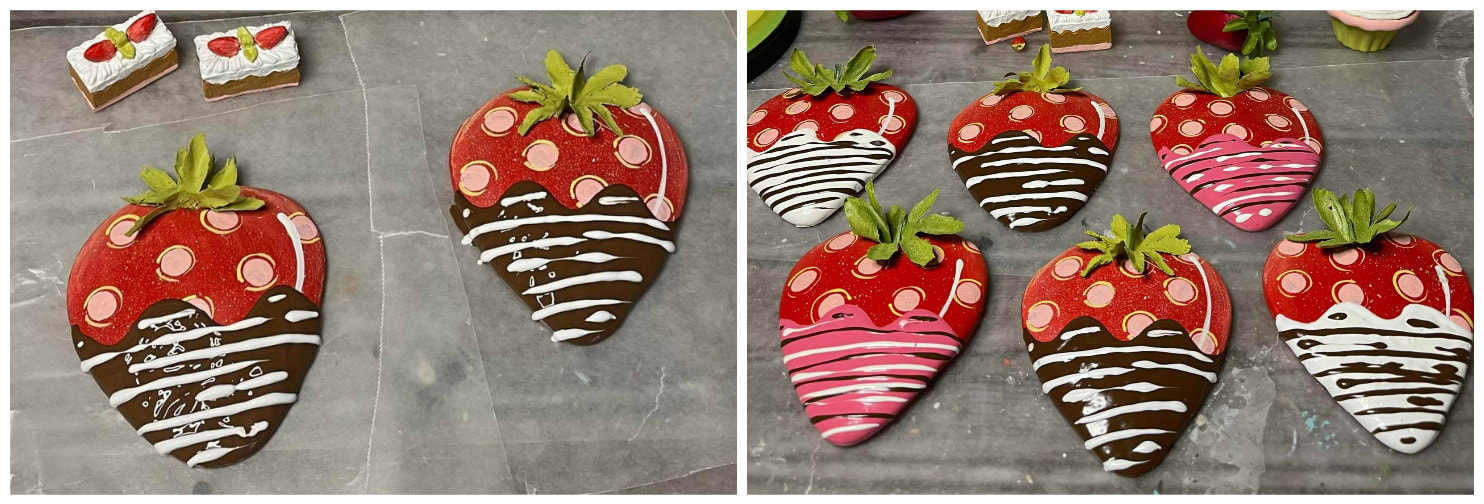
I like using objects most would have on hand. Using the end of a glue stick and Cotton Candy pink acrylic paint you will dot the top half of each strawberry.
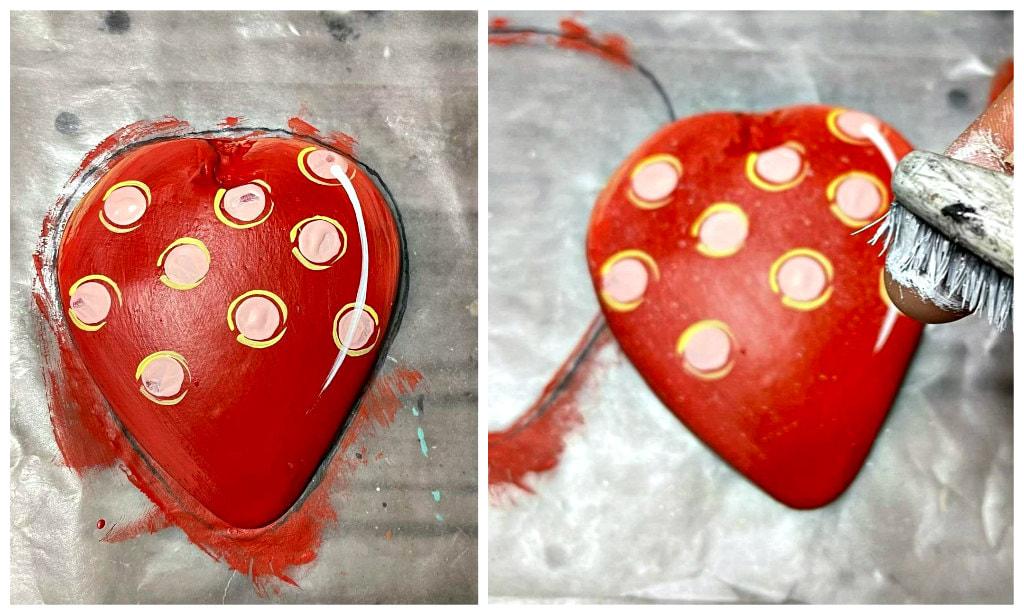
Highlight around each dot with the Banana Cream and make a white highlight along the right side of each strawberry. I splattered each Strawberry using an old toothbrush. You may have your own splattering technique.
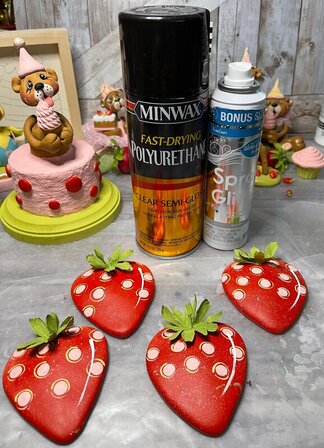
Spray and seal your Strawberries NOW before frosting. I used semi-gloss Polyurethane and spray glitter in silver from Wal-mart. Depending on what sculpting compound you used you may want to seal with what is compatible to your sculpting material as not all are alike.
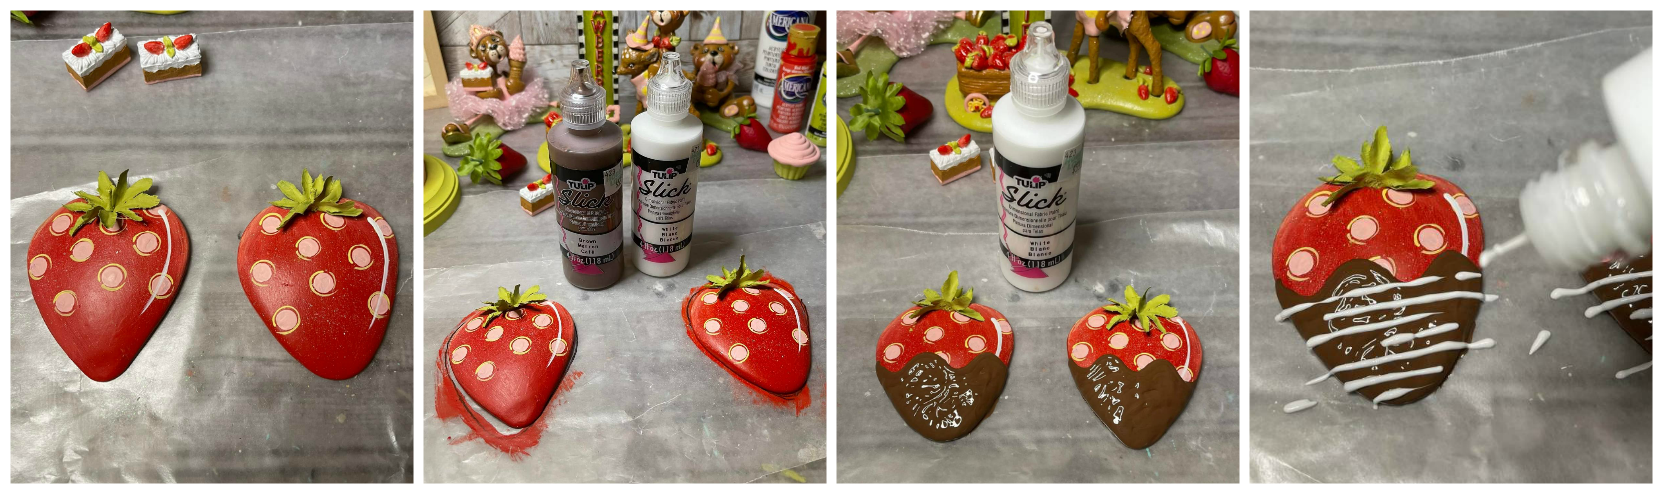
Now the fun part! Glue each stem topper in the top of each Strawberry with super glue. Using slick puffy paints, I drizzled on the Chocolate and then drizzled the white on top. Let sit overnight to cure and dry. There are many Faux frosting recipes but for the tutorial I used what most would be able to purchase at any craft store. Use your imagination with a variety of color choices.
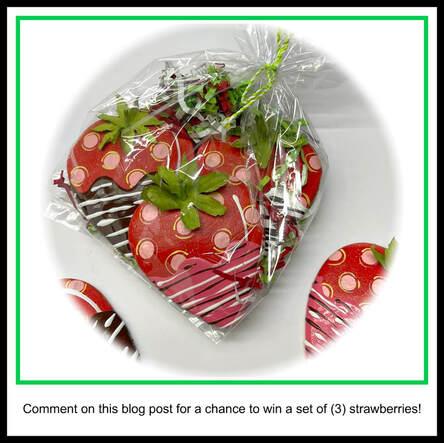
I hope you enjoyed this fun simple project and if so, be sure and comment below for a chance to win a set of (3) strawberries one of each color.
Blessings
Wendy
Blessings
Wendy