I am so excited to be a part of this Ornament Exchange Blog Hop with all these other amazing artist. I hope you will take the time to check out all of their wonderful projects.
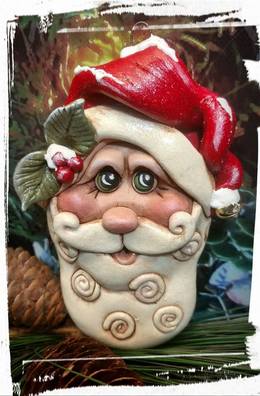
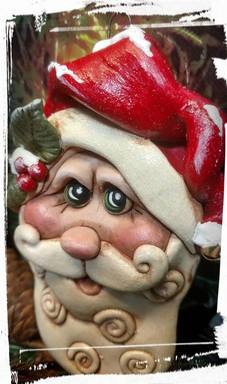
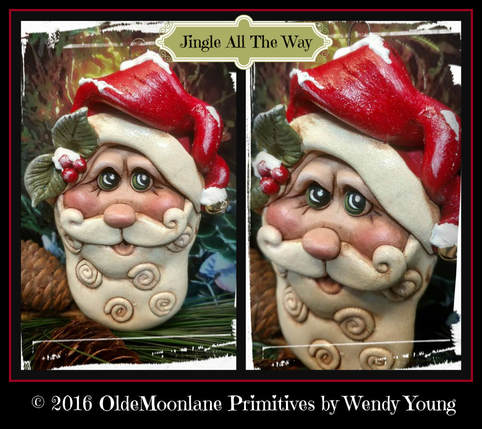
My project is "Jingle All The Way" . I posted on my FB group page ornament samples last year of possible pattern projects and this fella received the most votes. I decided to use him in the hop for all to enjoy and my way of saying Thank You to all who have supported me in my creative journey.
My project is "Jingle All The Way" . I posted on my FB group page ornament samples last year of possible pattern projects and this fella received the most votes. I decided to use him in the hop for all to enjoy and my way of saying Thank You to all who have supported me in my creative journey.
"Jingle All The Way"
© 2016 Wendy Young
You may create for personal use or pin money only no commercial mass production!
 |  |
Click on the link below for a PDF printable pattern.
| jingle_all_the_way_blog_ornament.pdf |
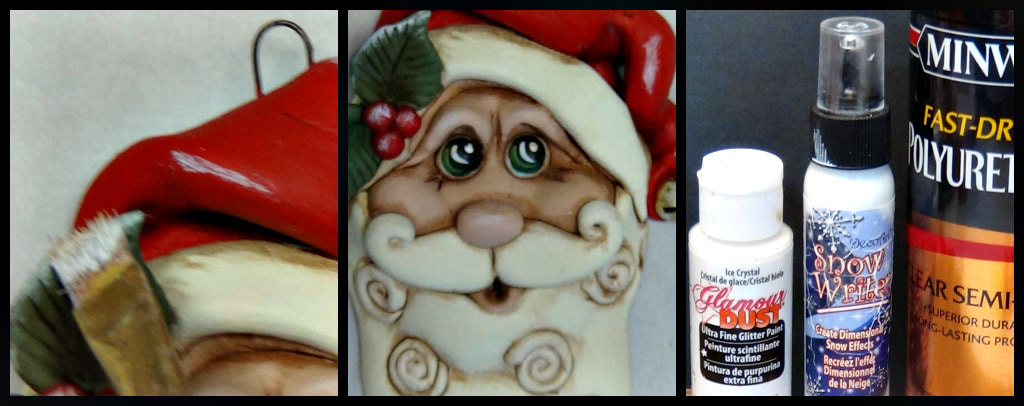
Supplies: (1) 2 oz. tube of quikwood (available in my etsy shop) https://www.etsy.com/shop/OldMoonLanePrimitive… , (1) 1/4" jingle bell, (1) piece of 1 1/2" wire (for hook hanger), blush (make-up), Poly acrylic sealer semi-gloss minwax (I get at wal-mart), wipes.
Tools: ruler, parchment paper (for work surface), pointy clay tool or a pencil will do, xacto knife or paring knife (not for eating), my favorite tool is a steel blade (not necessary but its great for lifting pieces off the parchment paper).
Mediums: (All DecoArt) extender, glamour dust, snow writer, antiquing any shade its your preference. I find most like different shades.
Paints: (All DecoArt Americana) Primary Red, Warm Beige (flesh), Snow White, Light Buttermilk, Black Titanium, Light Avocado, Black Forest Green, Hauser Light Green.
Brushes: Liner, small flat, old scruffy brush for dry brushing. You do not need nice fancy brushes for painting on quikwood as in time they get worn. I never use my "good" brushes for sculpting pieces.
Tips:
Sculpting Instructions-
Tools: ruler, parchment paper (for work surface), pointy clay tool or a pencil will do, xacto knife or paring knife (not for eating), my favorite tool is a steel blade (not necessary but its great for lifting pieces off the parchment paper).
Mediums: (All DecoArt) extender, glamour dust, snow writer, antiquing any shade its your preference. I find most like different shades.
Paints: (All DecoArt Americana) Primary Red, Warm Beige (flesh), Snow White, Light Buttermilk, Black Titanium, Light Avocado, Black Forest Green, Hauser Light Green.
Brushes: Liner, small flat, old scruffy brush for dry brushing. You do not need nice fancy brushes for painting on quikwood as in time they get worn. I never use my "good" brushes for sculpting pieces.
Tips:
- Please read all instructions before beginning.
- QuikWood preparation- When working with QuikWood, you may want to lightly coat your hands with hand protectant cream or any lotion to keep QuikWood from sticking to your hands.
- I use DecoArt extender medium to smooth and blend QuikWood to any surface. "Remember a dab will do ya!!" DO NOT over use extender, it could make your QuikWood sticky.
- Mixing QuikWood: You will use an X-ACTO knife to evenly slice off desired amount needed for each step. DO NOT mix entire tube at once or it will harden before you are ready to use. Mix QuikWood until white/tan colors are evenly mixed. Directions come with each tube.
- I like working on parchment paper as the parchment paper can easily peel off and is disposable.
Sculpting Instructions-
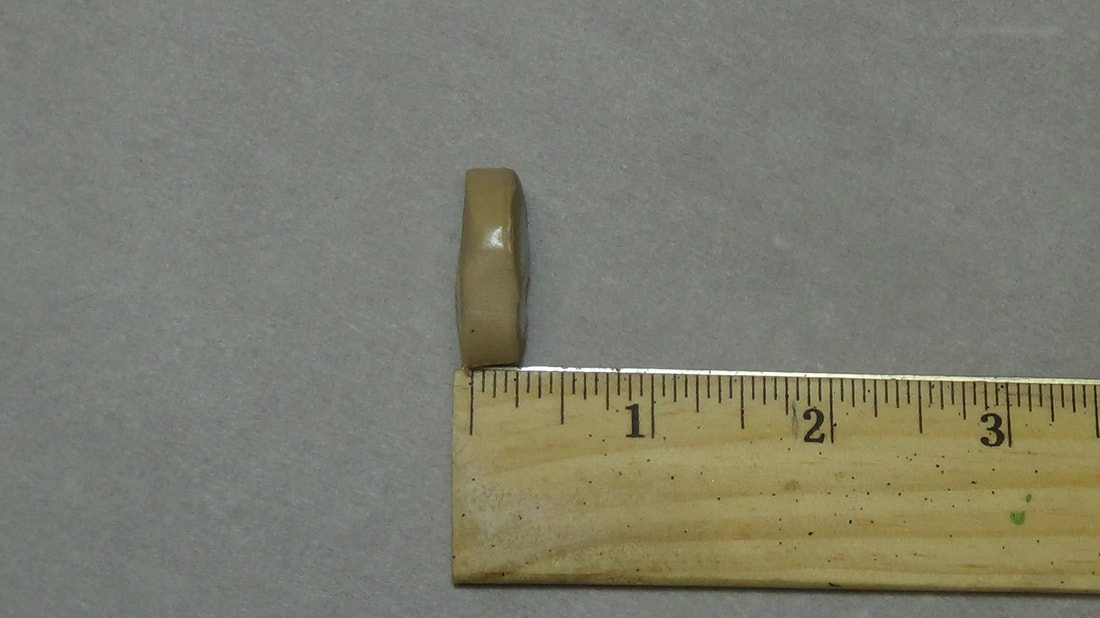
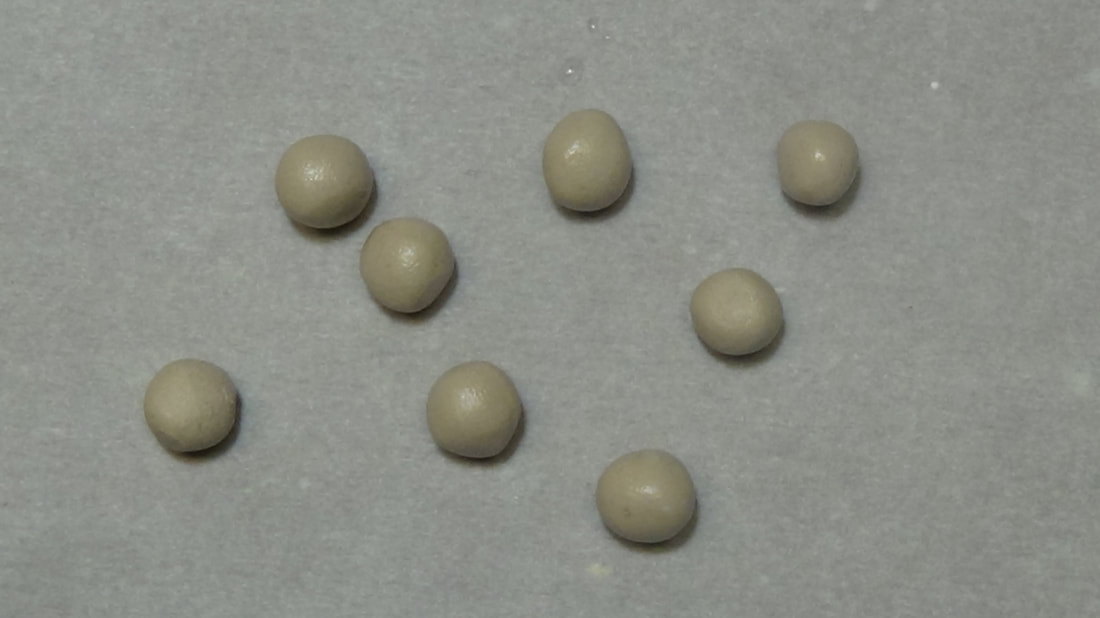
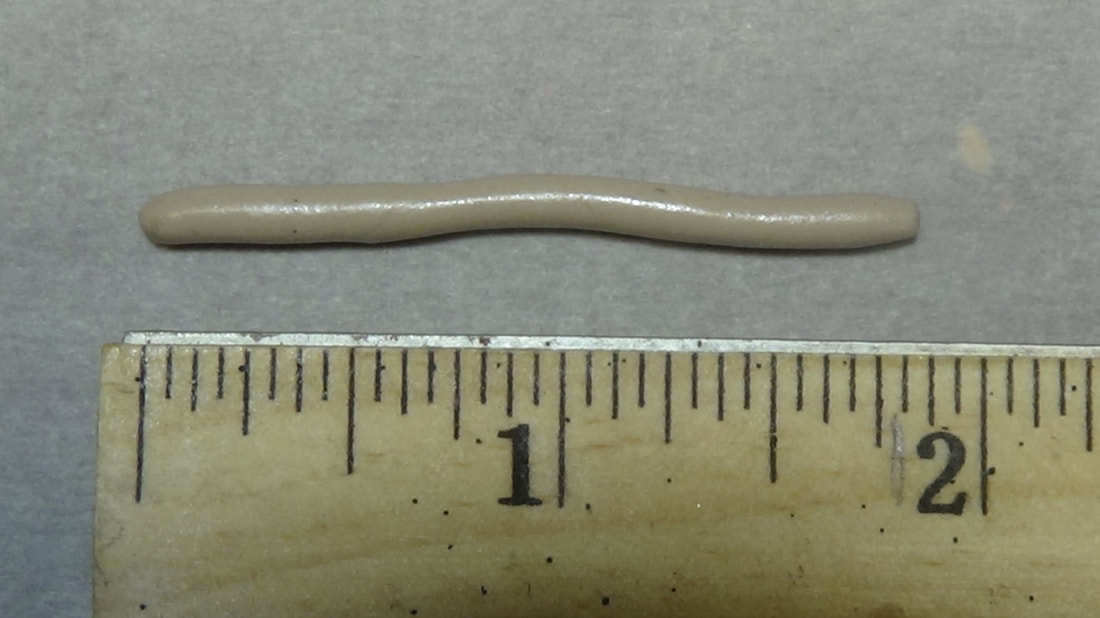
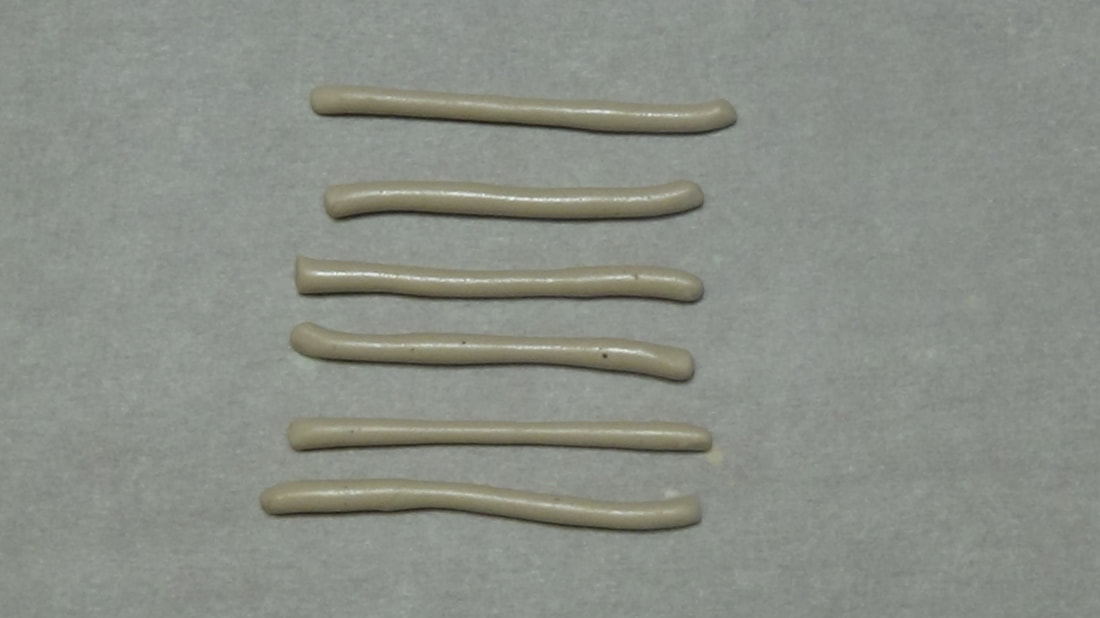
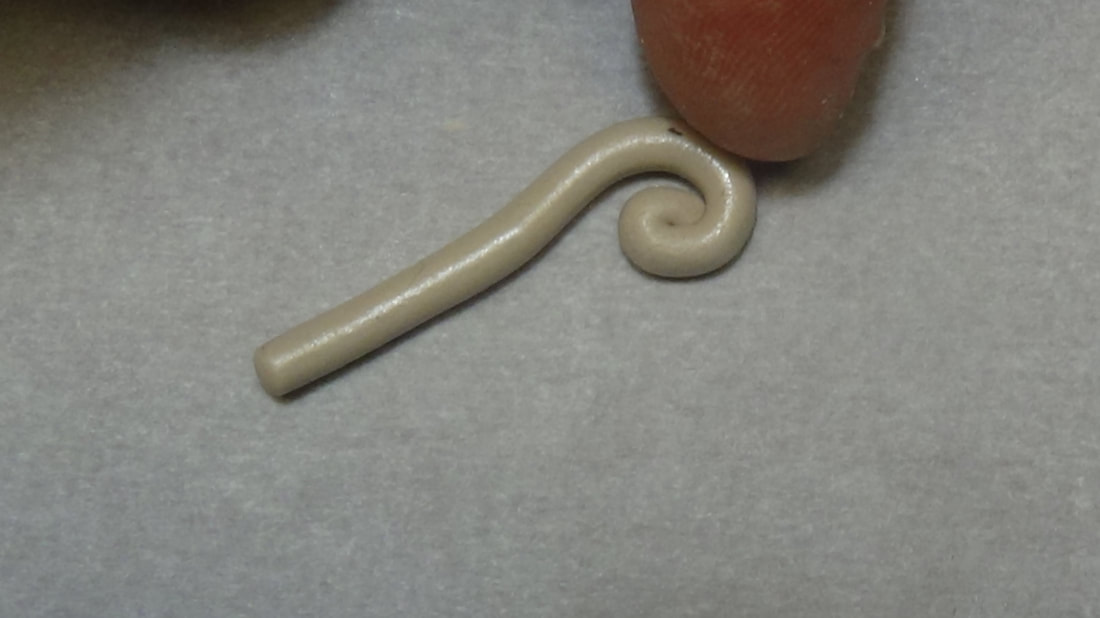
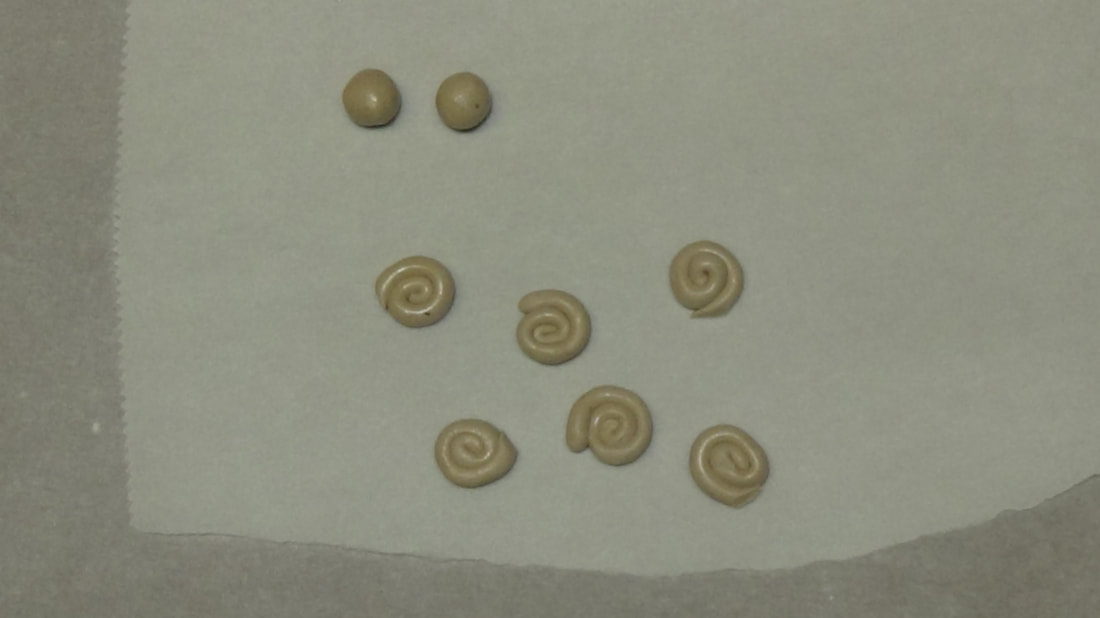
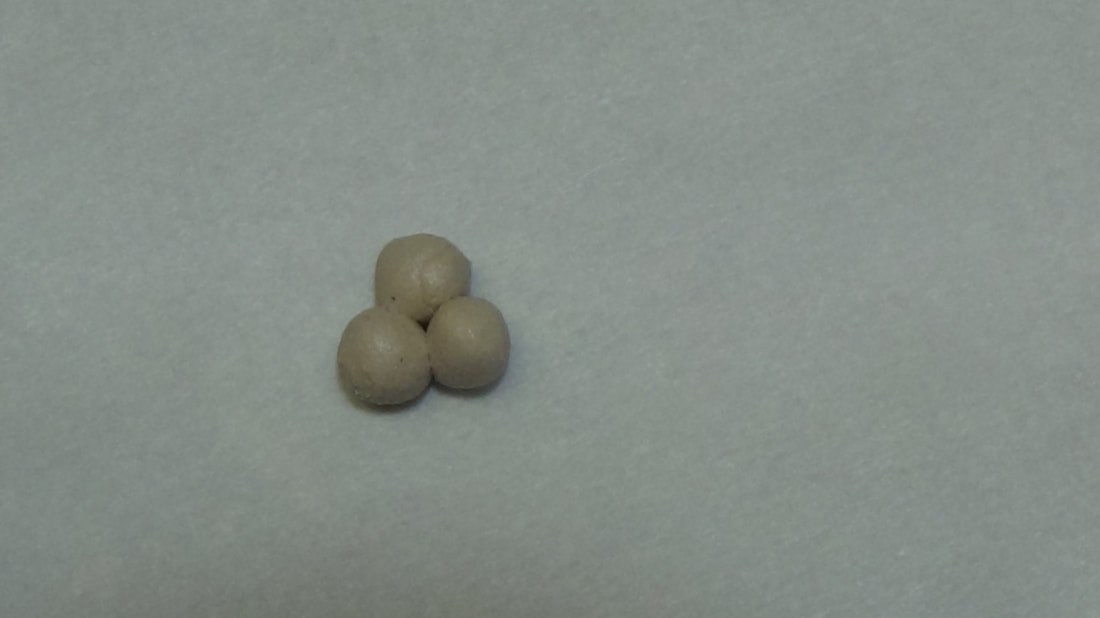
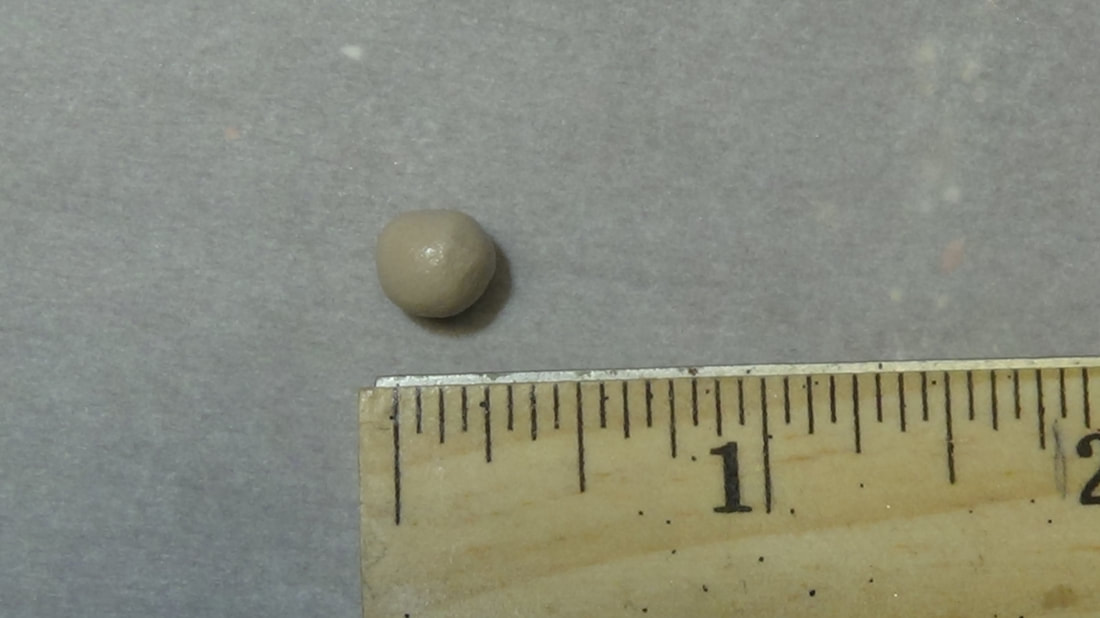
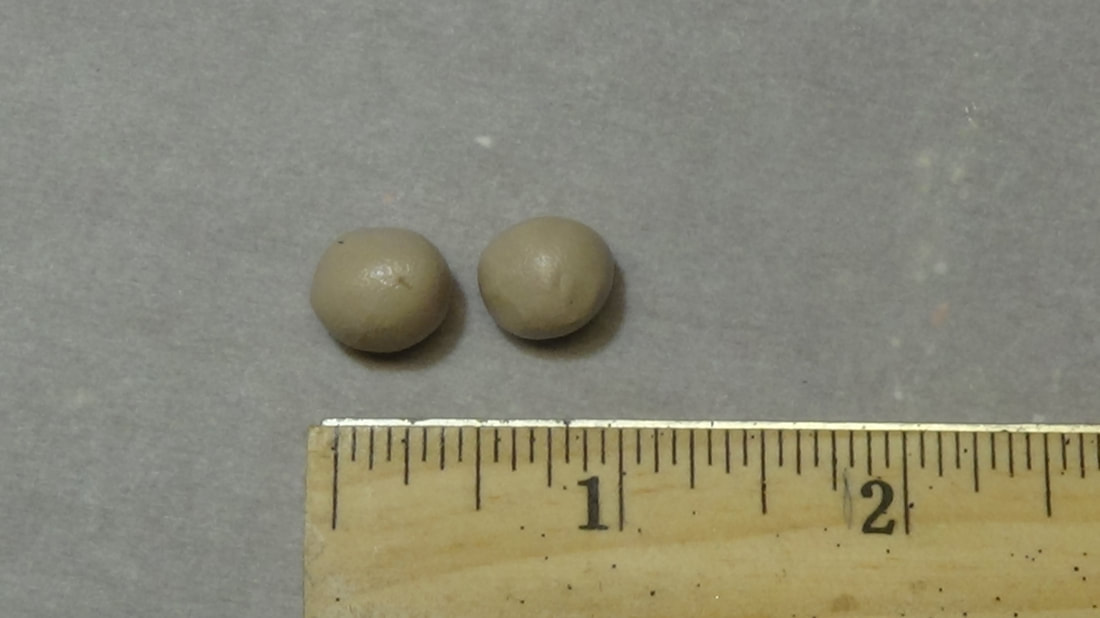
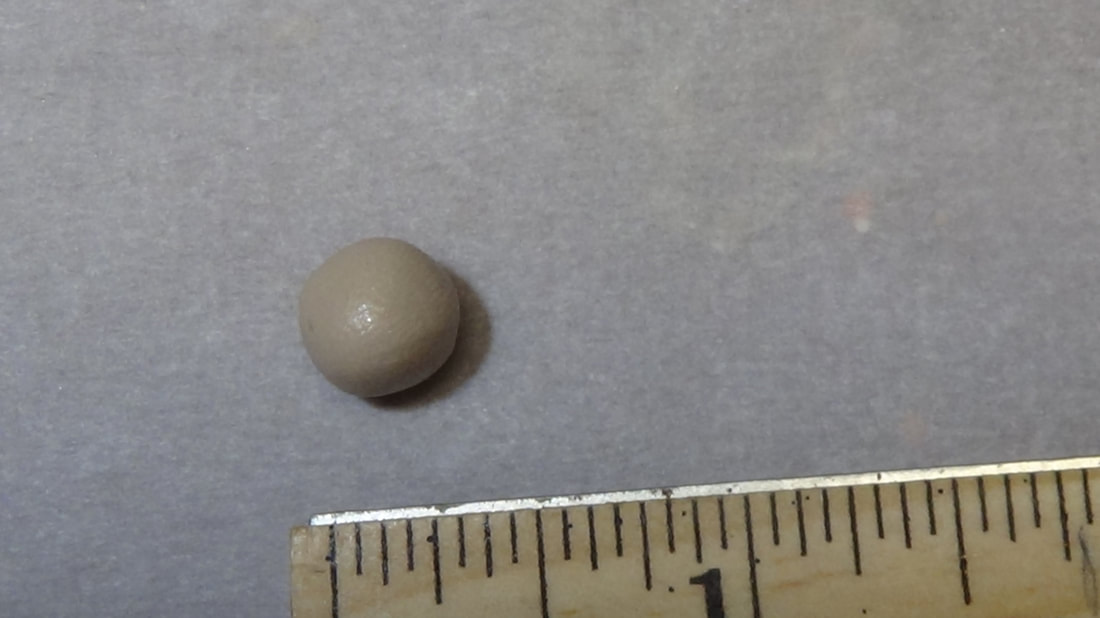
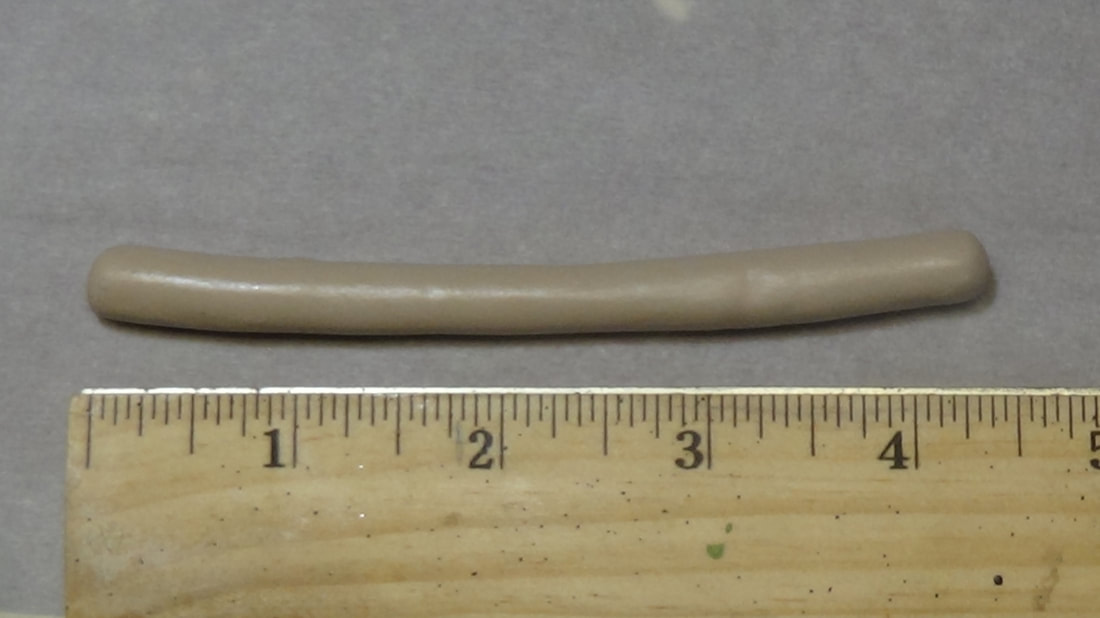
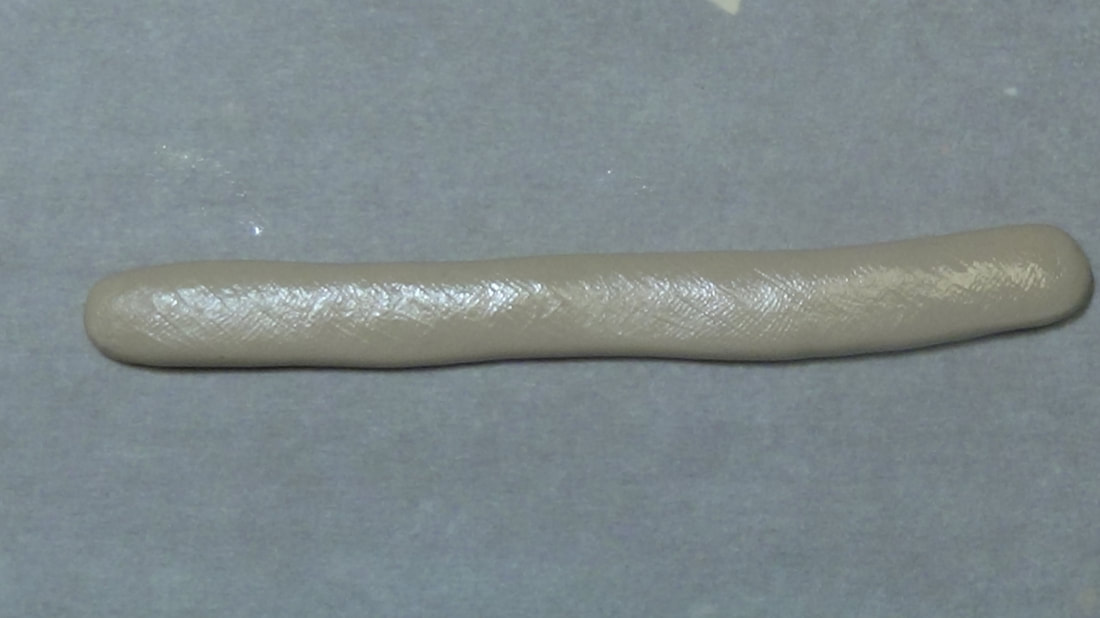
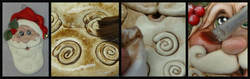
Beard Curls and Eyes- (You want to make these ahead and let them cure.) Slice 1/4" of quikwood, knead and prepare. Roll (8) tiny equal balls. (Save (2) for the eyes) Roll (6) 1 3/4" long coils, roll each coil into a curl. Set everything aside and let cure fully 20-30 minutes!! This is important because you don't want them to lose their shape when you insert them.
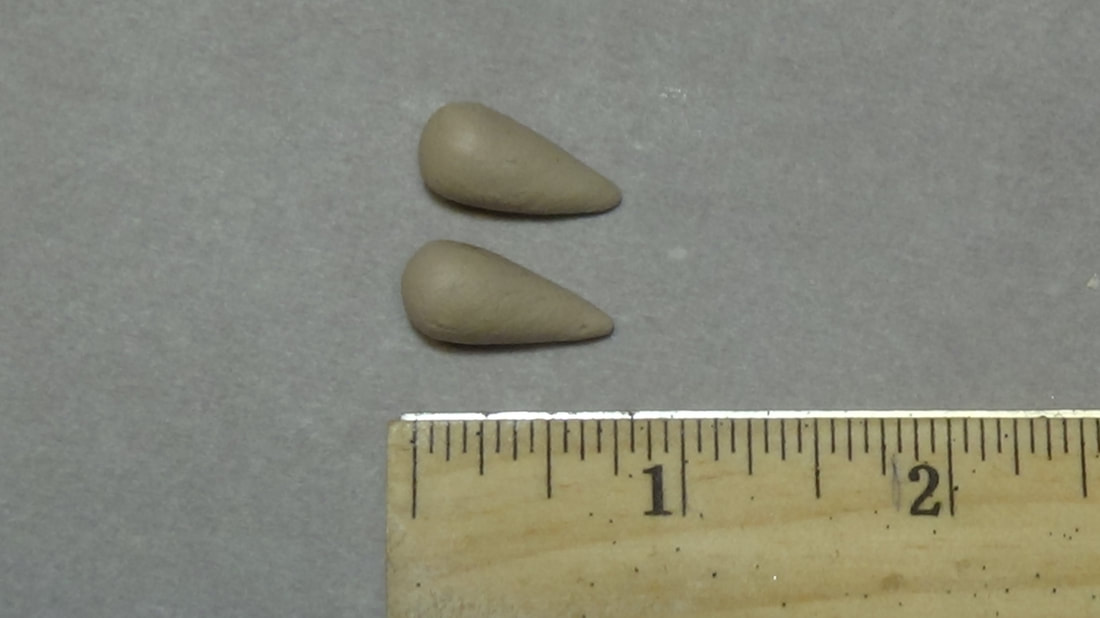
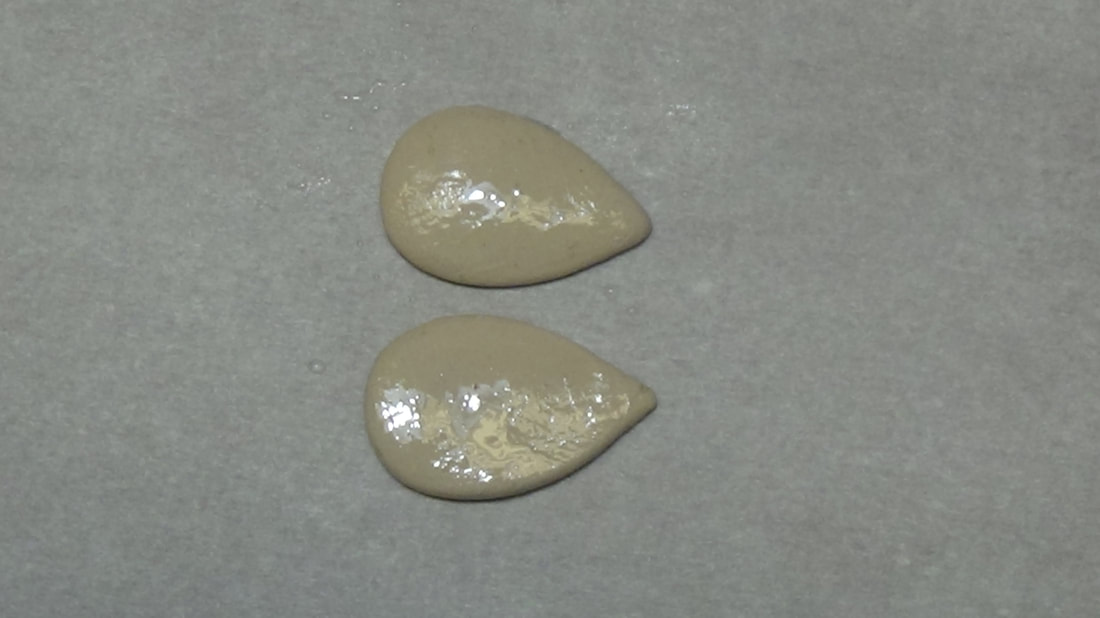
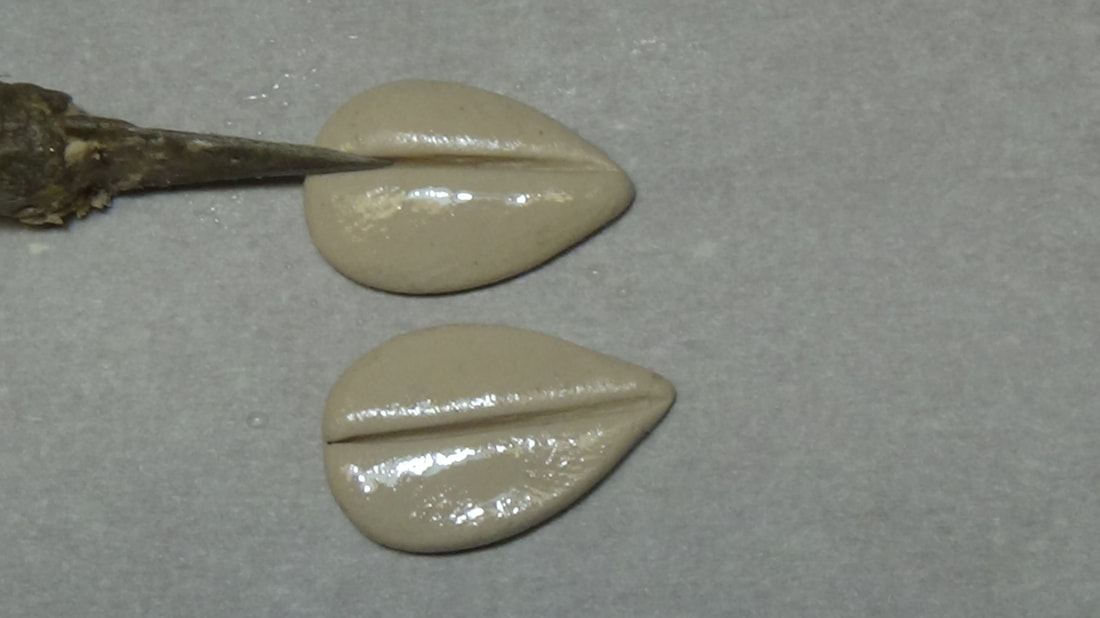
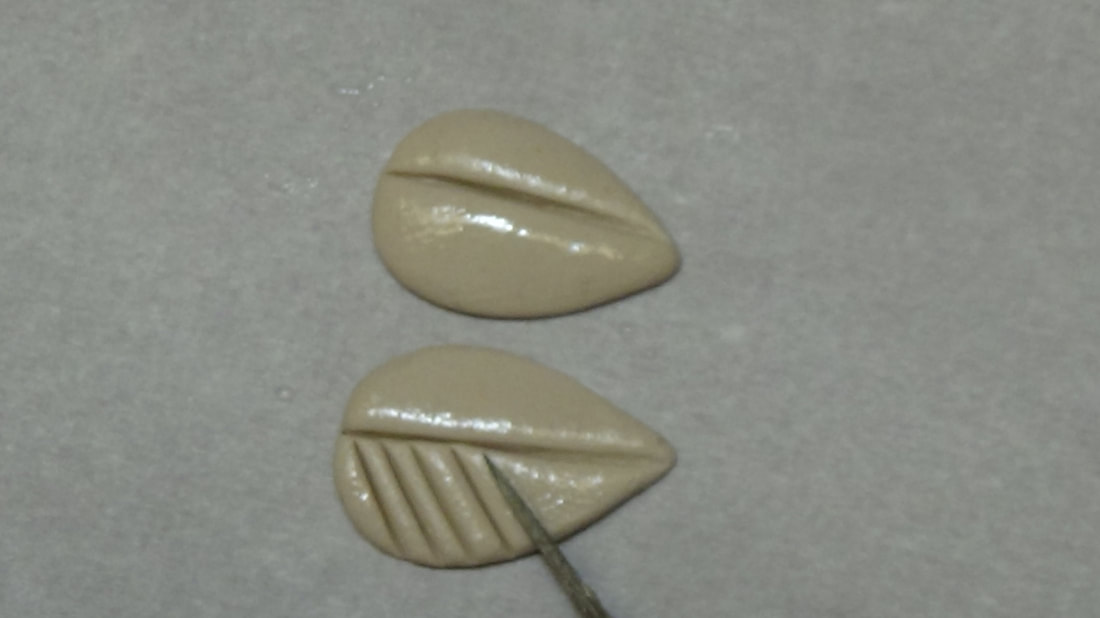
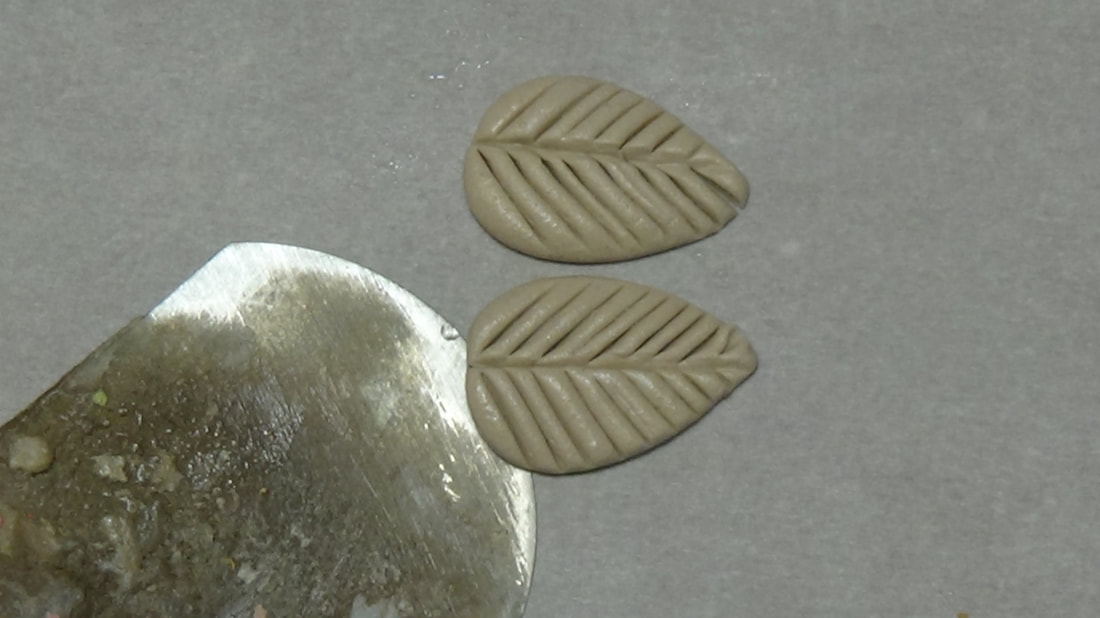
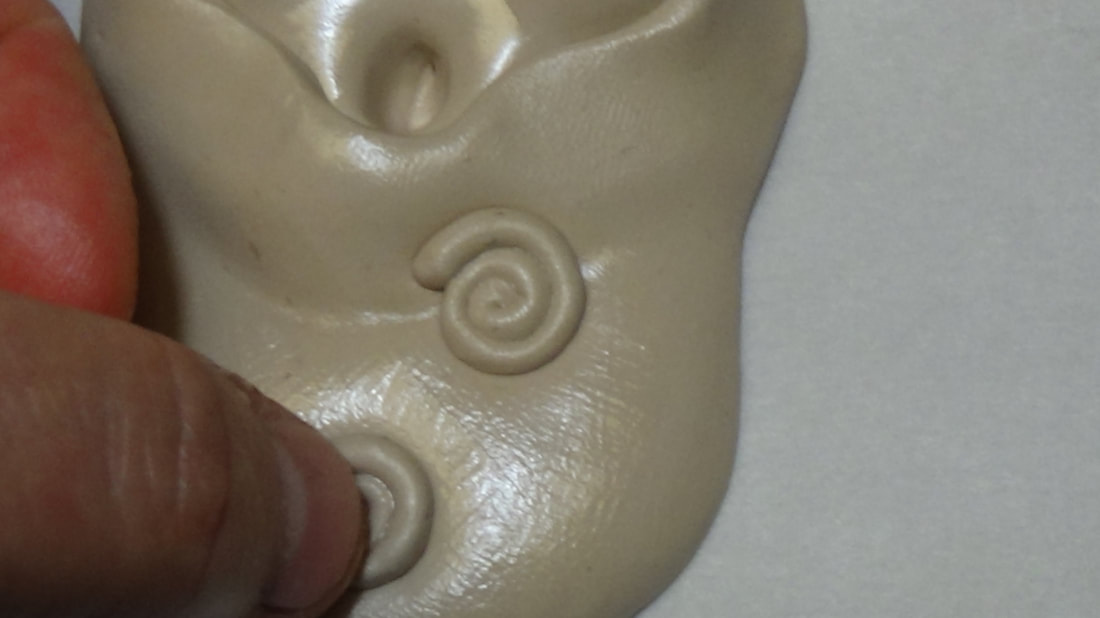
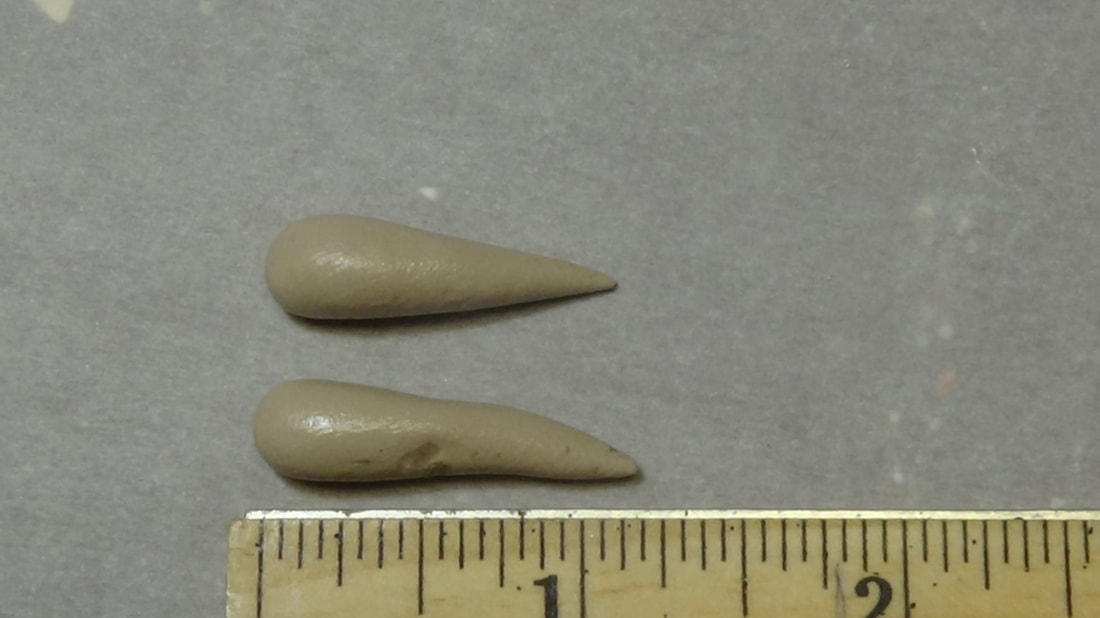
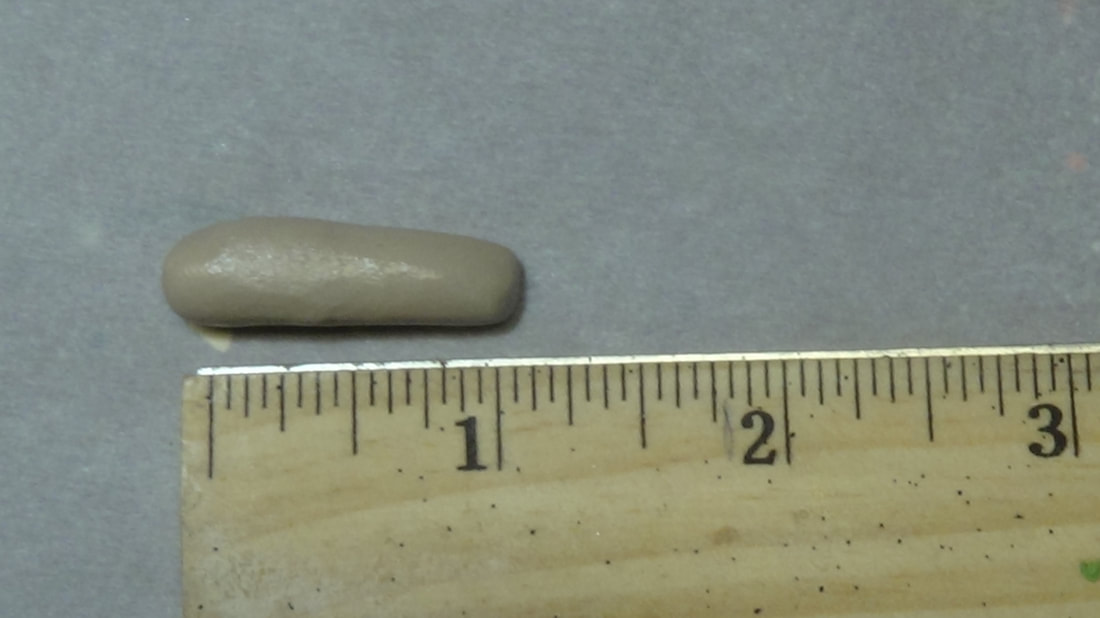
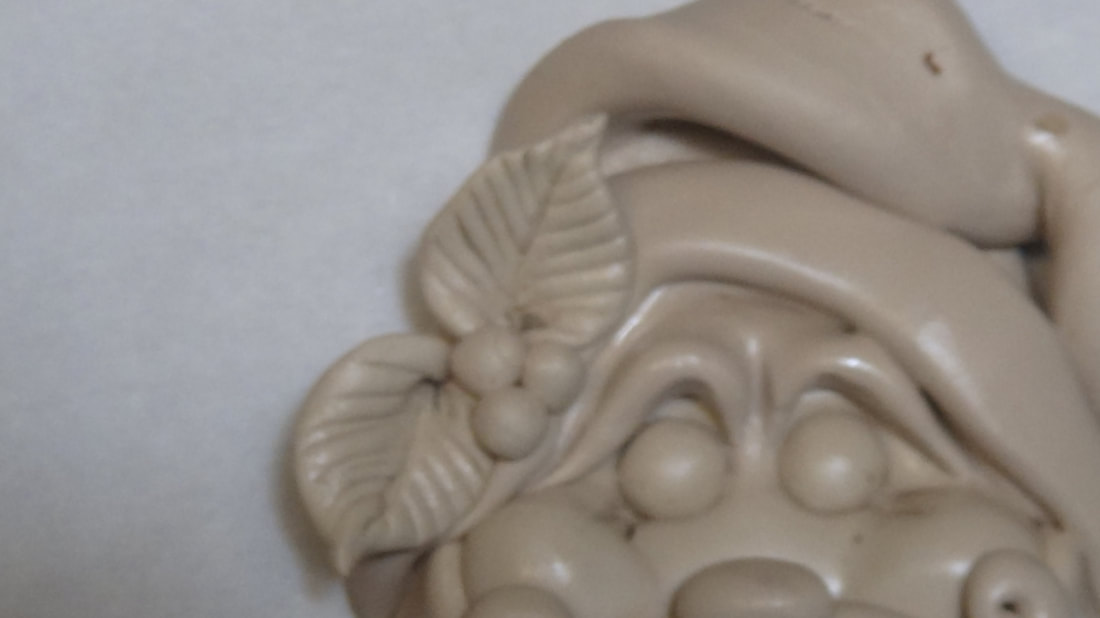
Leaves and Berries- (You want to make these ahead and let them cure.) Slice 1/4" of quikwood, knead and prepare. Roll (3) 1/8" balls for the berries. Roll the remainder of the quikwood into (2) equal balls, roll each into a 3/4" cones and slightly flatten. Using your xacto, score a center vein in each leaf. Next, score the veins on each side beginning at top wide end downward. (make sure right direction). Wrap the wide end around a pointy tool or pencil to shape Set berries and leaves aside to fully cure 20-30 minutes! This is important because you don't want them to lose their shape when you insert them.

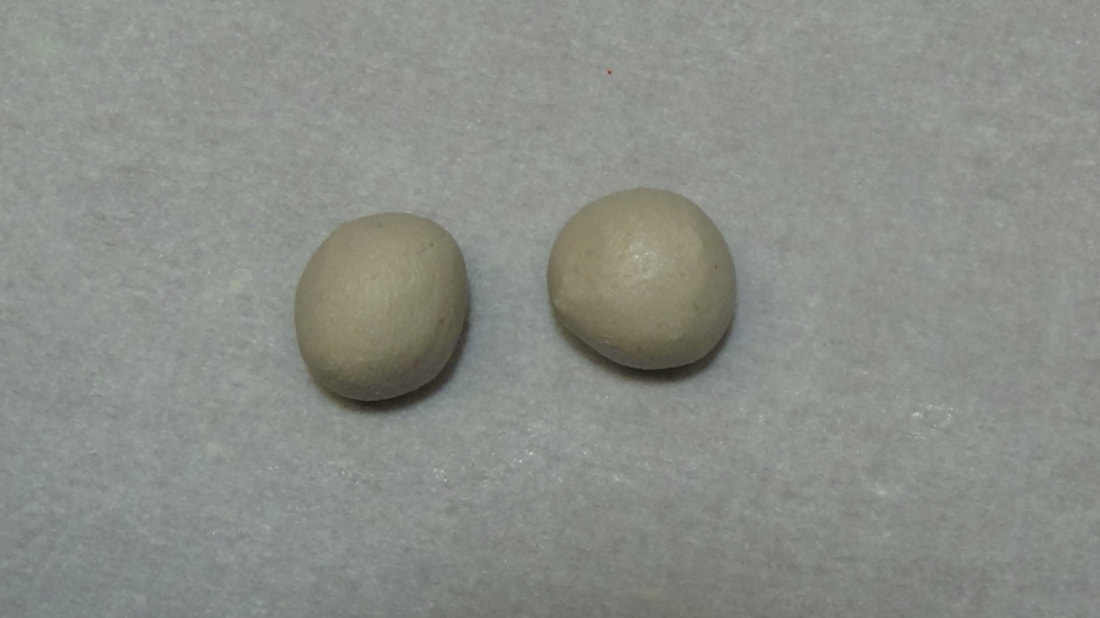
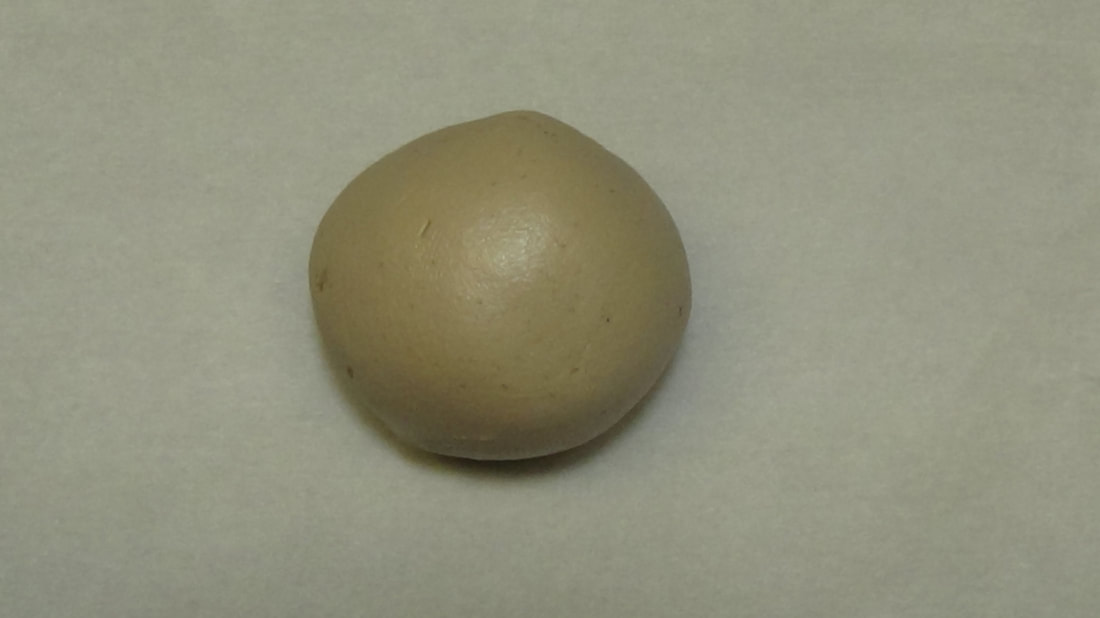
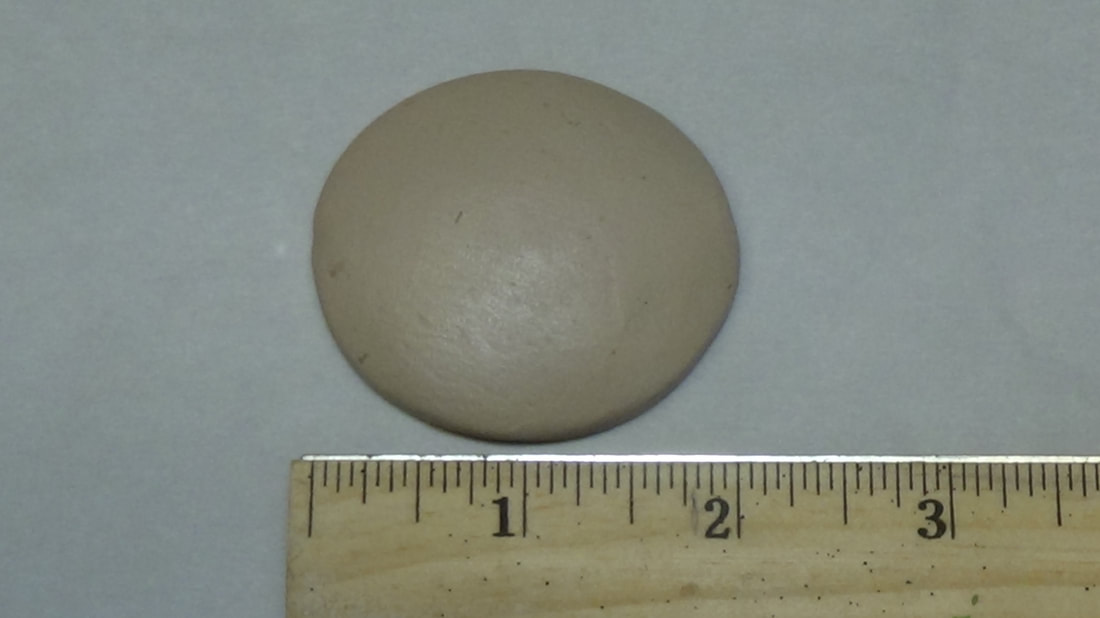
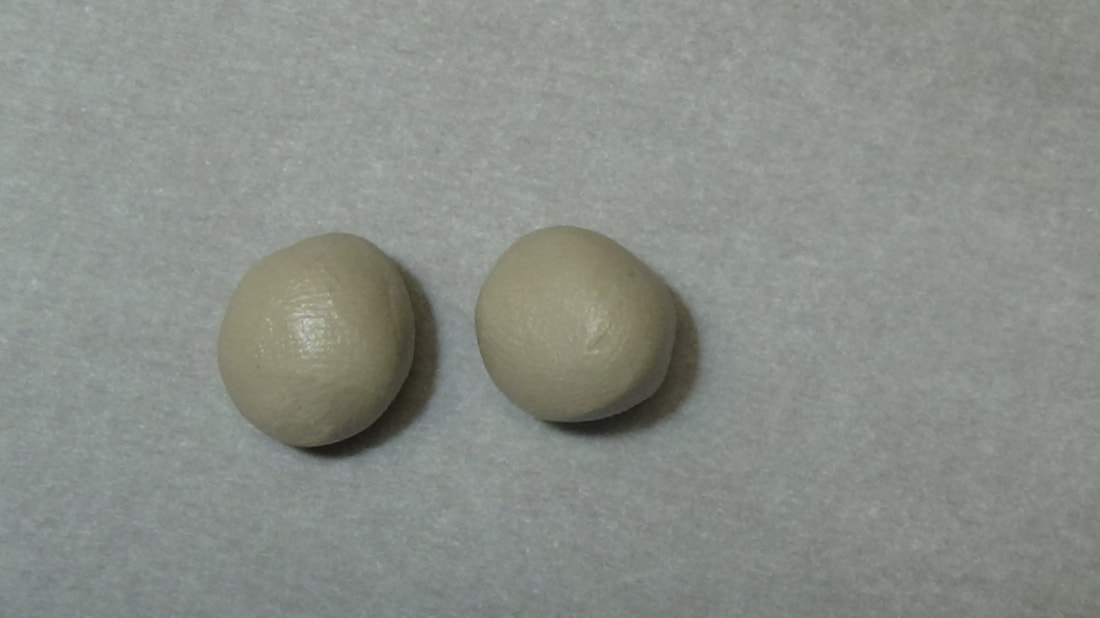
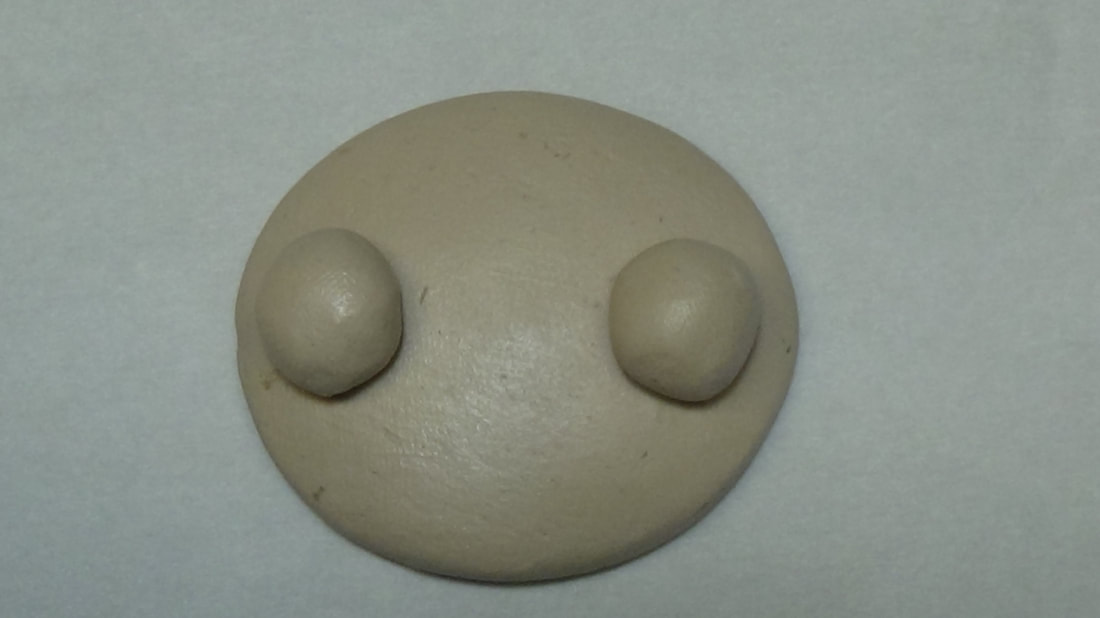
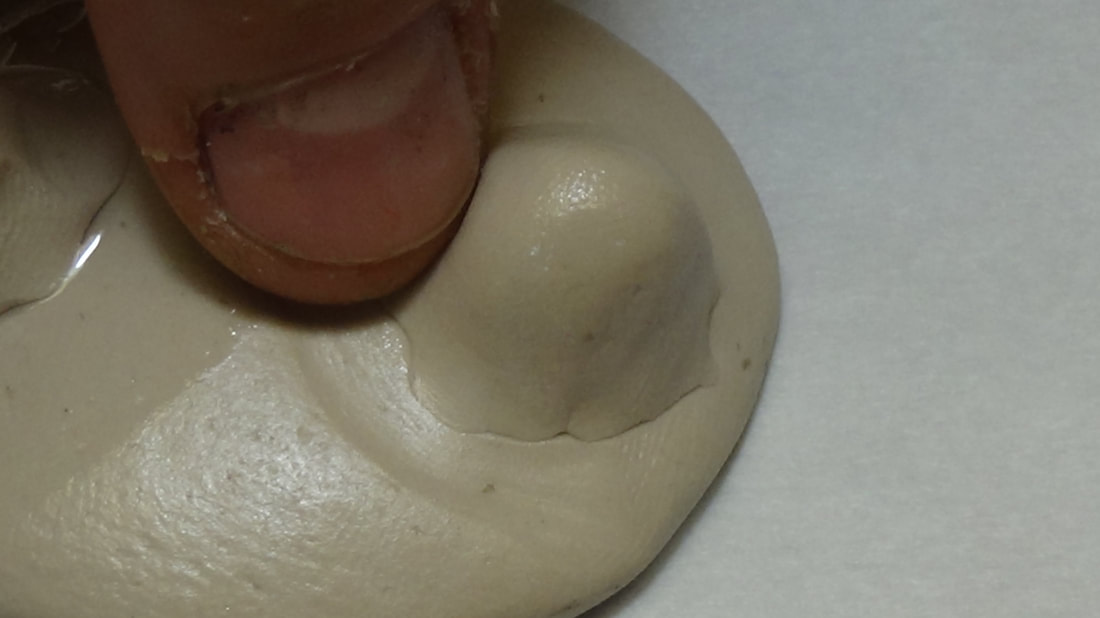
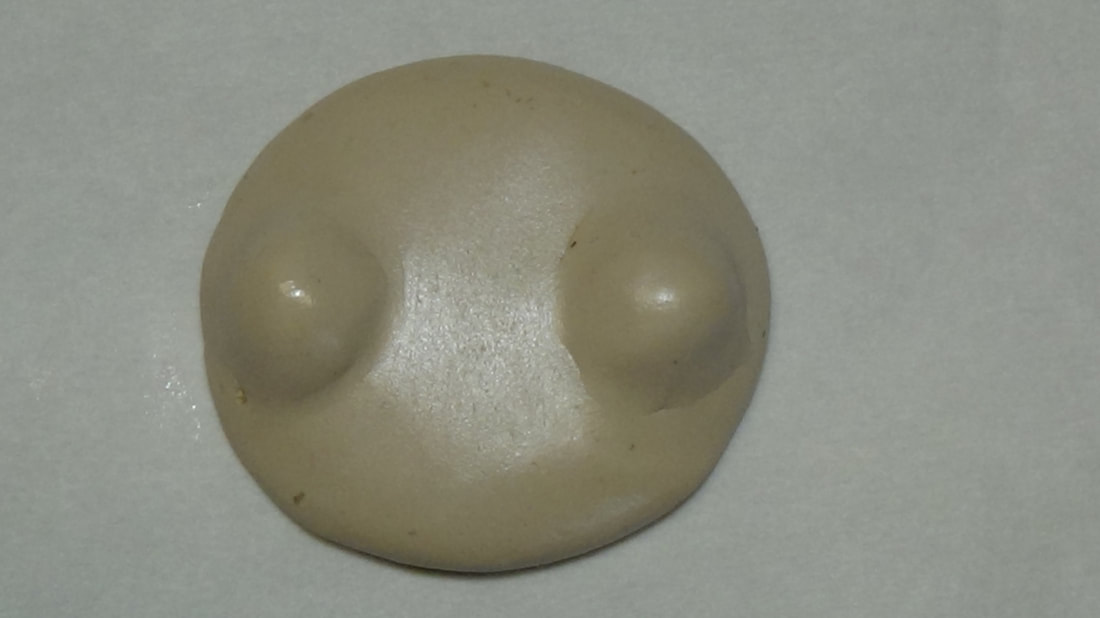
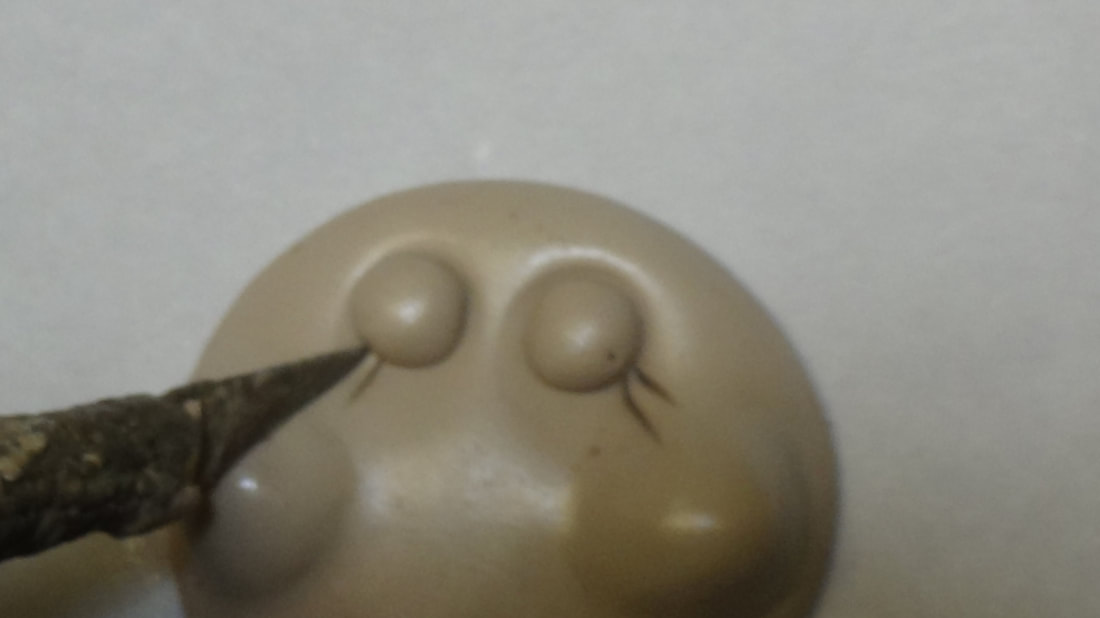
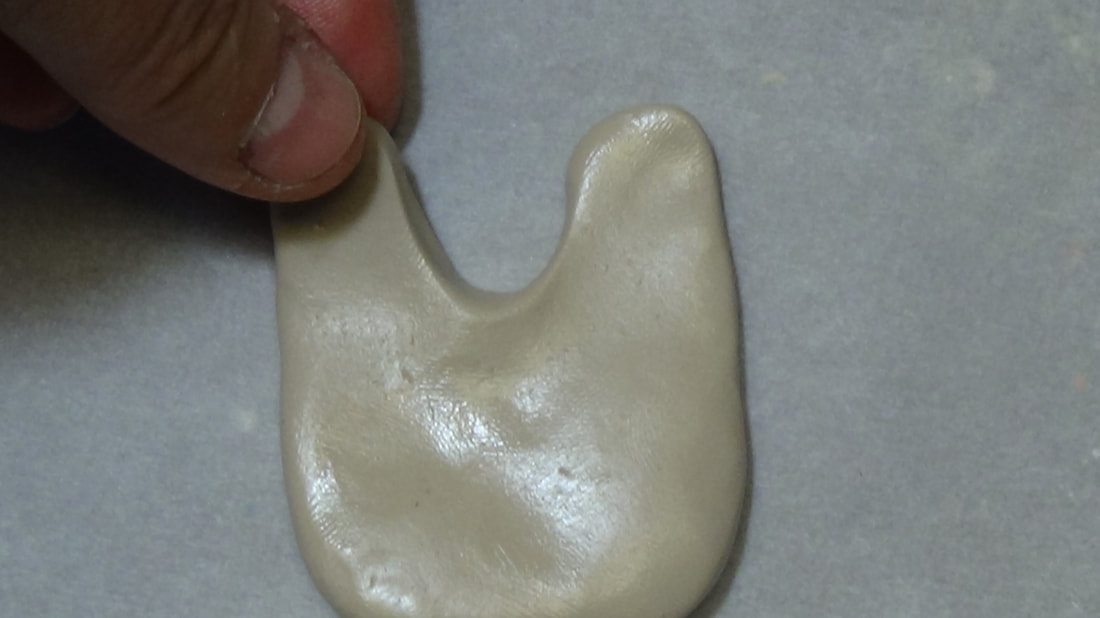
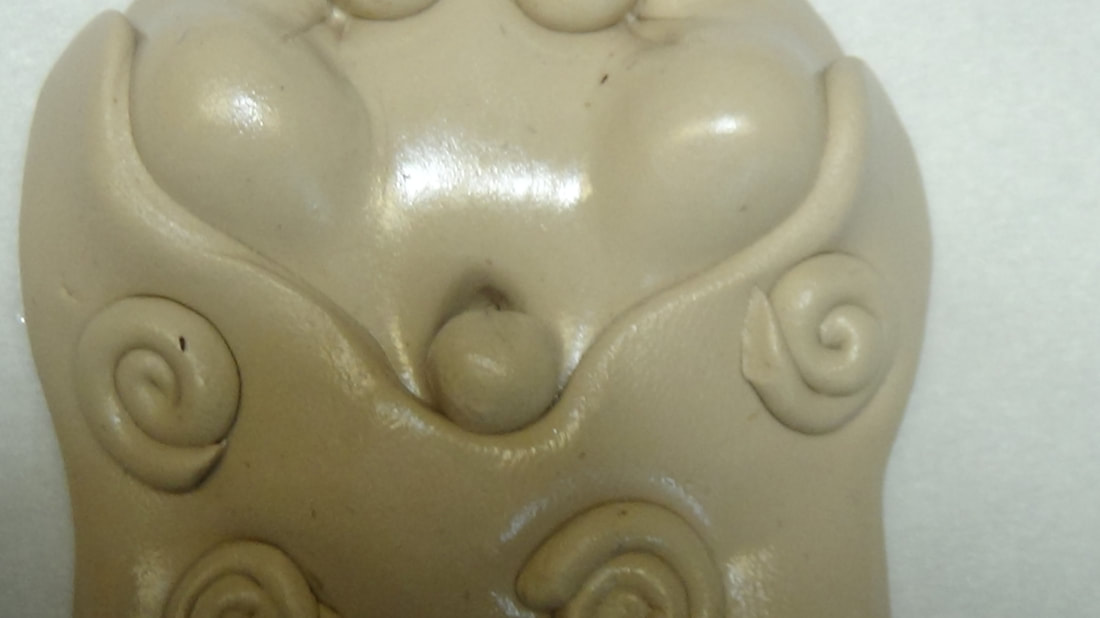
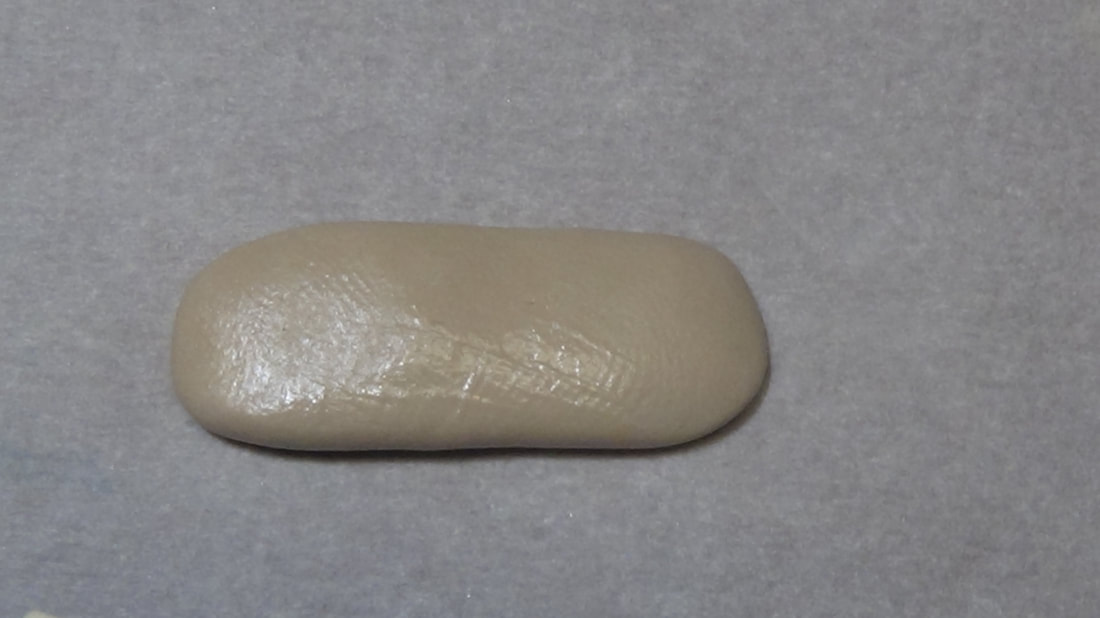
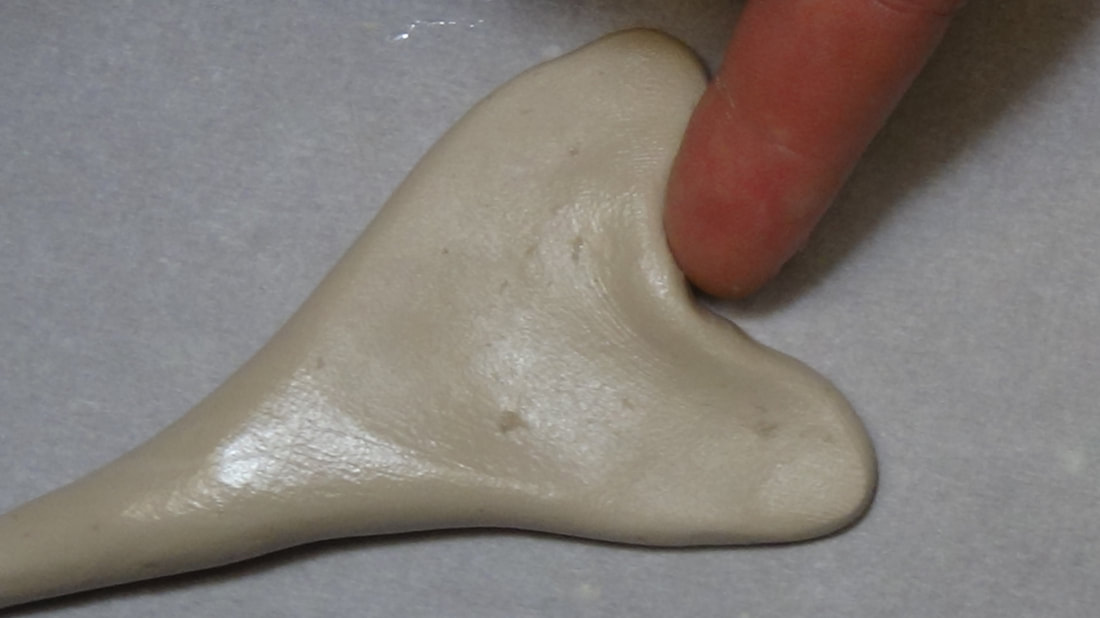
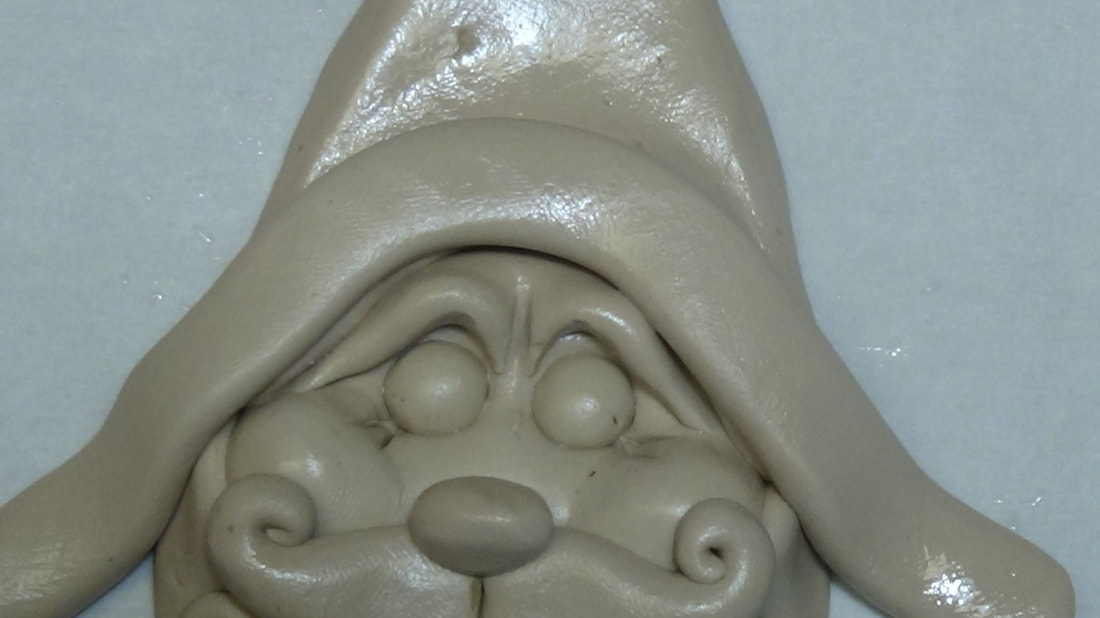
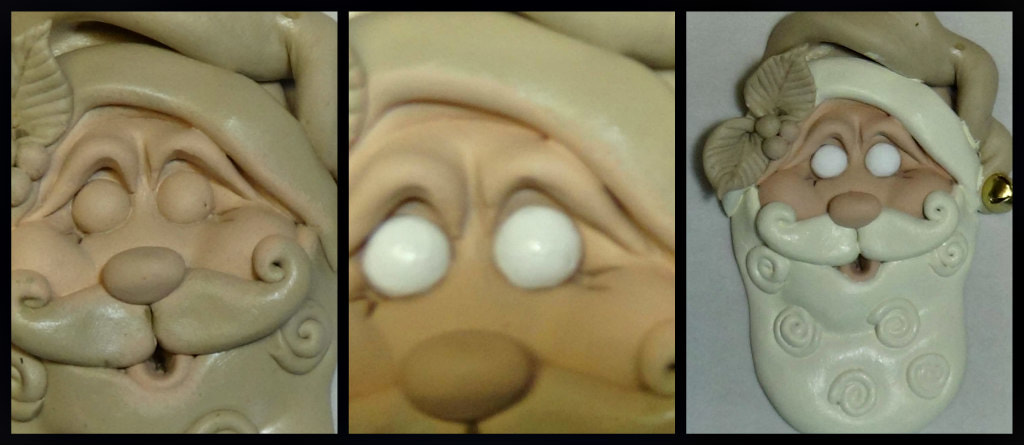
Face Base and Cheeks- Slice 1 1/2" of quikwood, knead and prepare. Roll into a ball and flatten slightly to a 2" diameter (no more than that or you will have a flat pancake face and no thickness to insert eyes!). Slice 1/8" of quikwood, knead and prepare. Roll into (2) equal balls, place them on center outside edge of the base and blend the edges into the base with a dab of extender. (DO NOT blend in all of the quikwood, you want a big cheeky Santa).
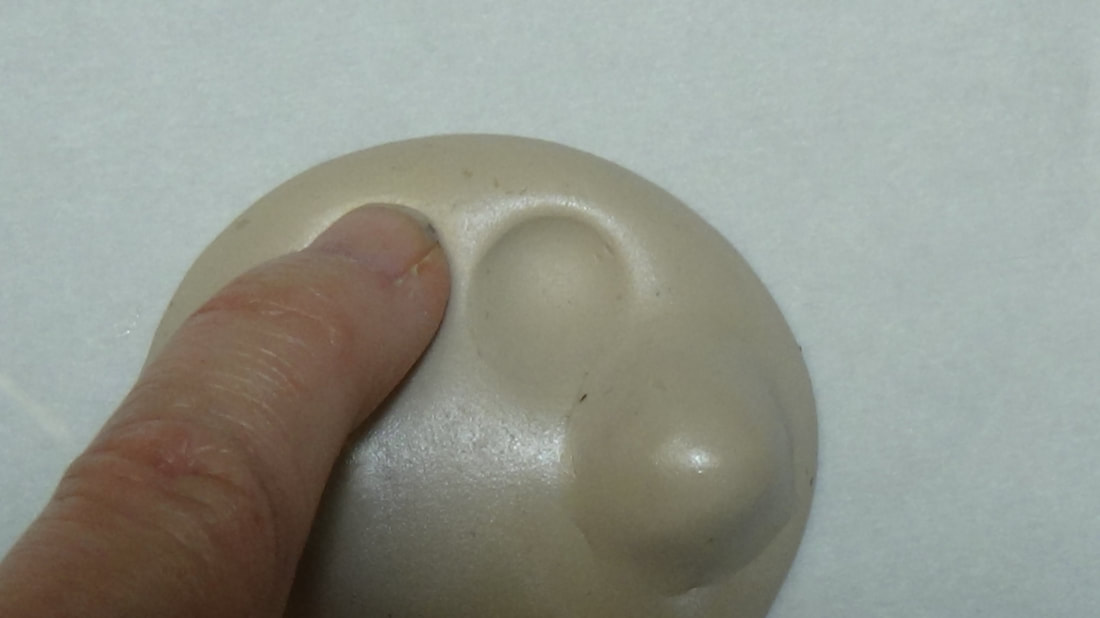
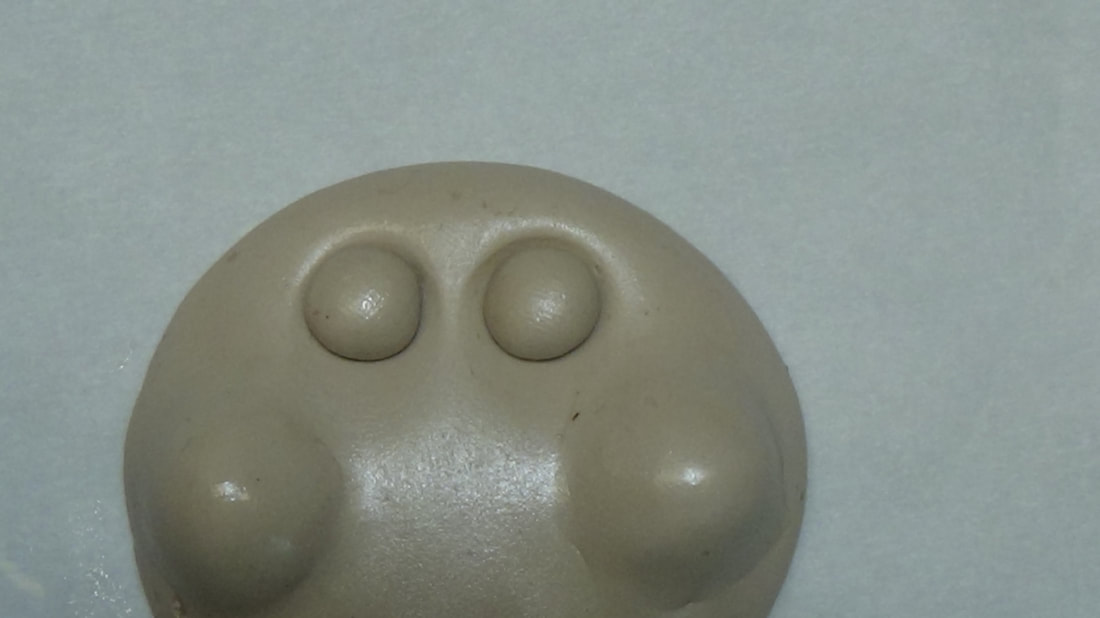
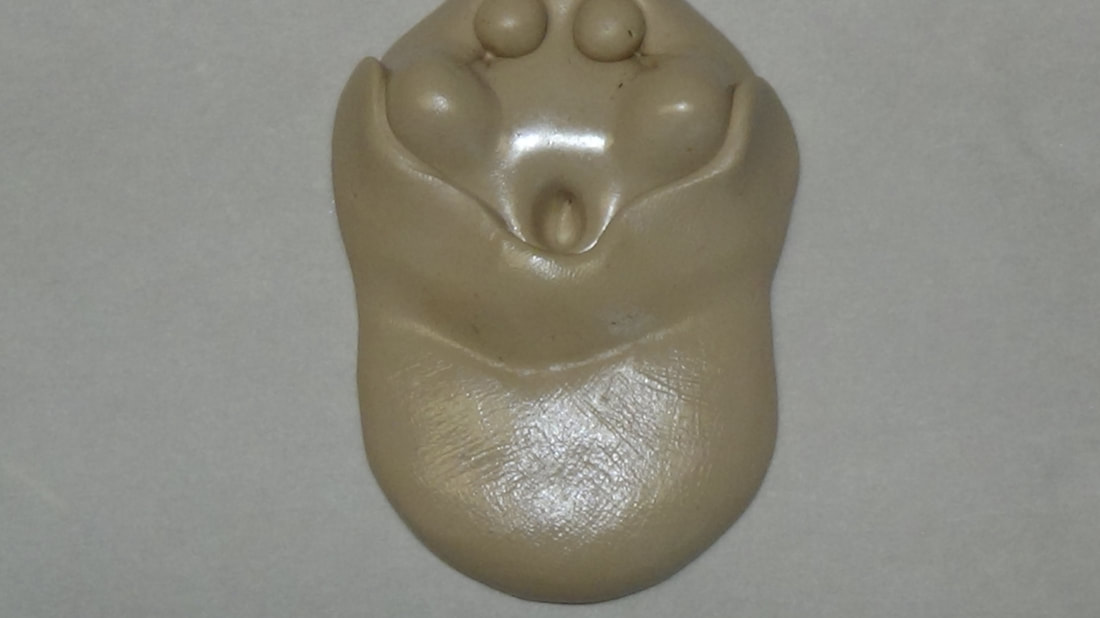
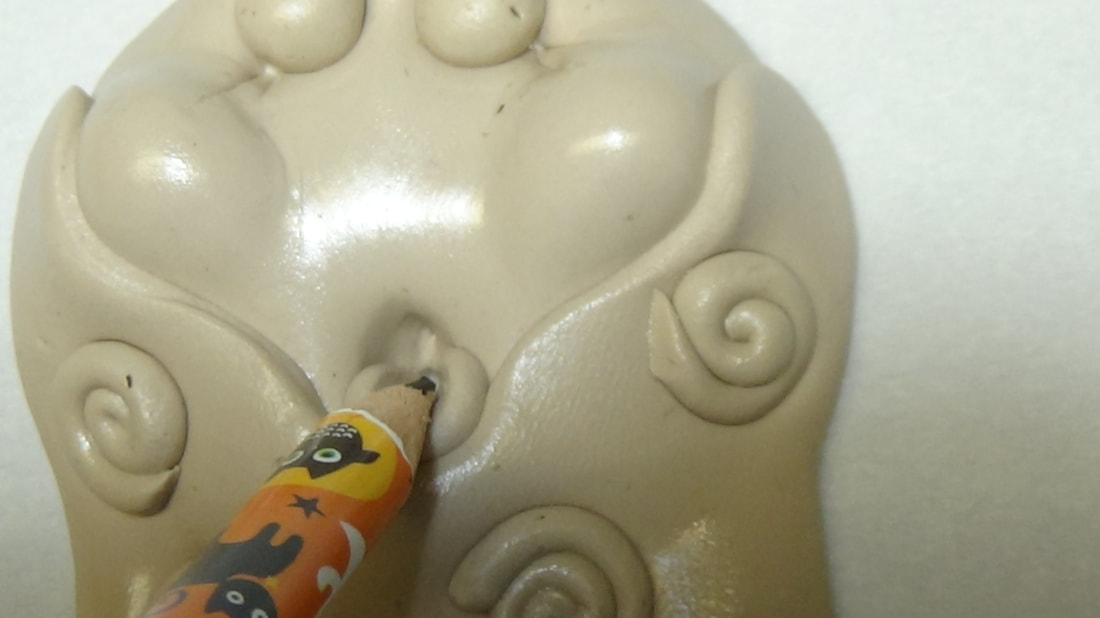
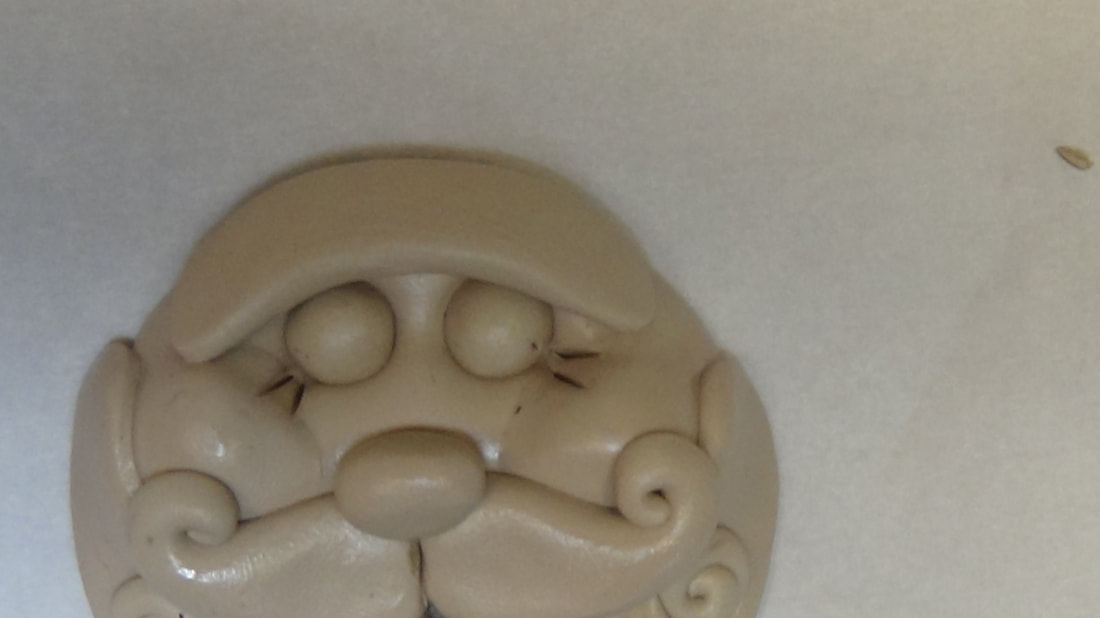
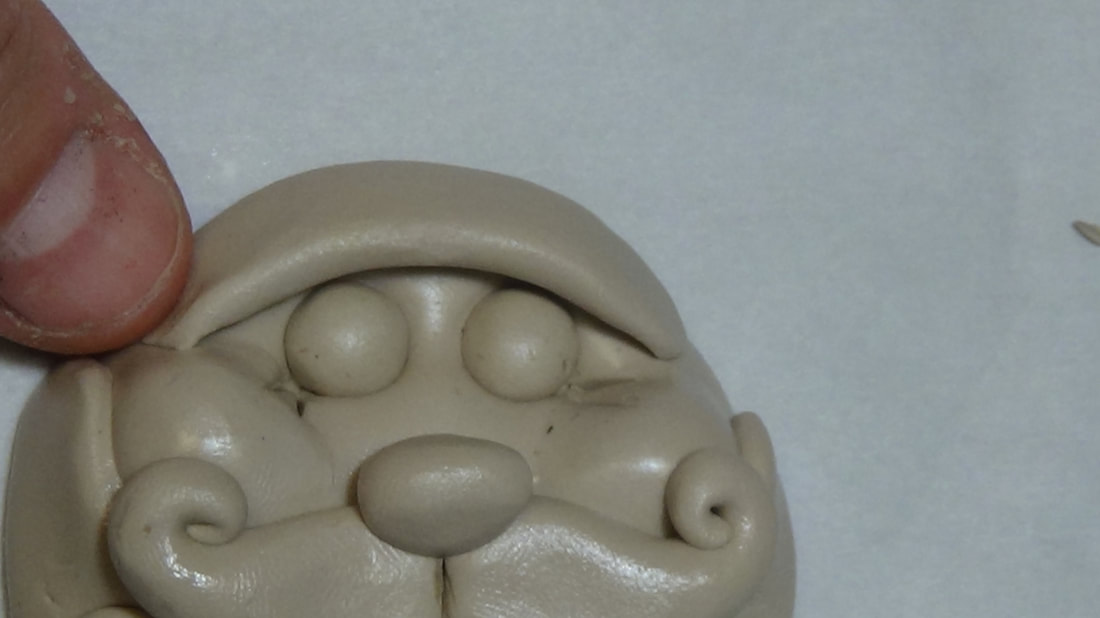
Inserting Eyes- Indent each eye socket using your little finger with a slight push in and up just above the center of the cheeks. Insert each CURED eye into the socket. Using your knife or xacto slice (2) lines just outside of each each for eye crinkles.
Mouth Opening and Beard- Insert your pointy tool in the bottom center of the face base with a slight push in and down/out. Remember you need room for the nose and mustache. Slice 1 1/2" of quikwood, knead and prepare. Roll into a 1 3/4" fat cone and flatten slightly. Begin pulling up the sideburns on the pointy end of the cone. Do this gradually and slowly till you have enough to wrap up and under the lip, cheeks and sides. Insert your CURED curls into the beard randomly.
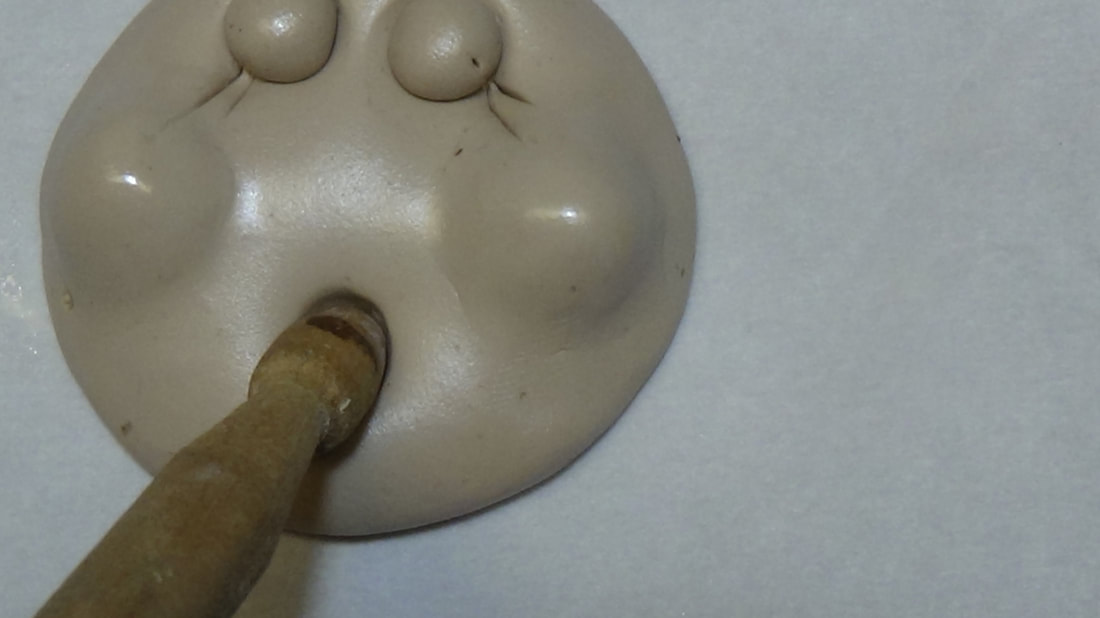
Lip- Slice a tiny sliver of quikwwod, knead and prepare. Roll a tiny ball and place it at the opening of the mouth. Insert your pencil or pointy tool just above the ball and give a push down and out.
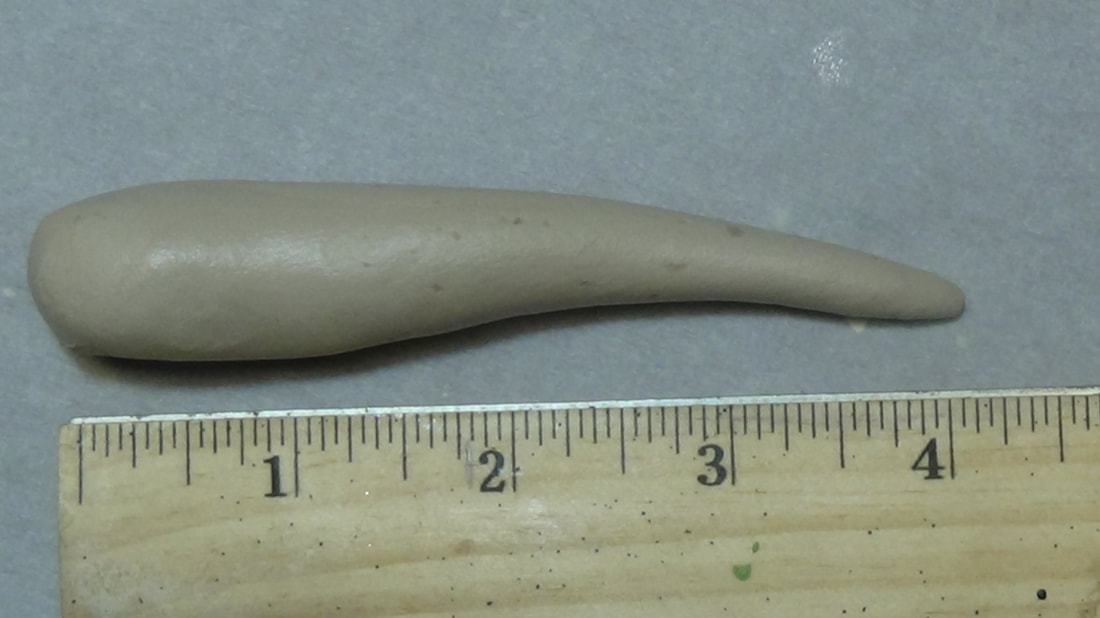
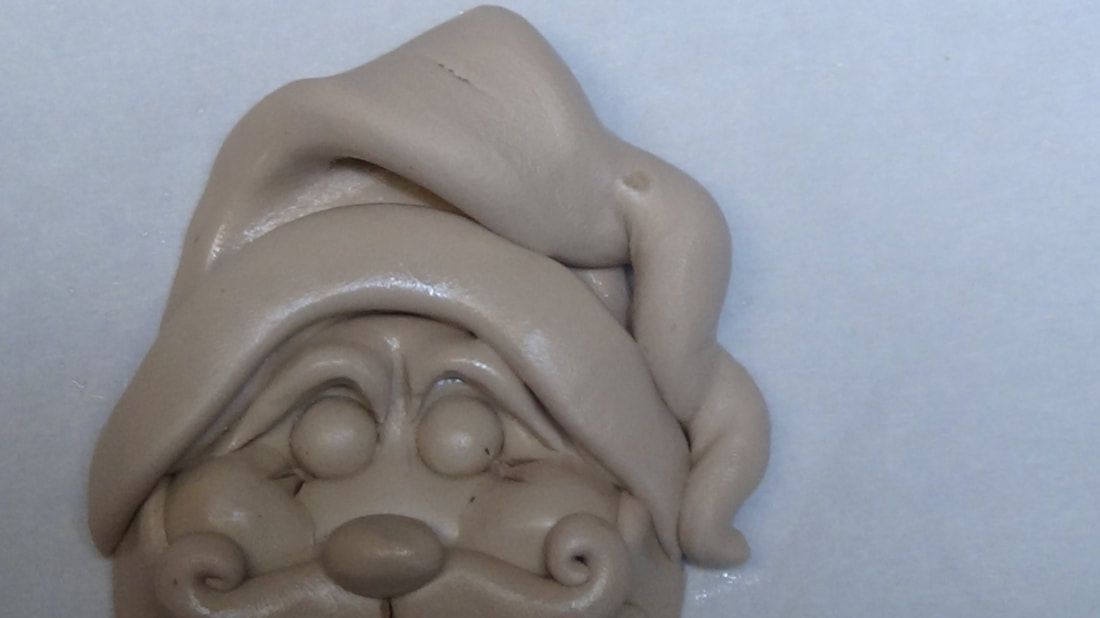
Mustache and Nose- Slice 1/8" of quikwood knead and prepare. Roll two equal balls, roll each ball into a 1 1/8" cone. Place the cones together just above the mouth with the wide ends in and give a slight press. Curl the tips up and in.

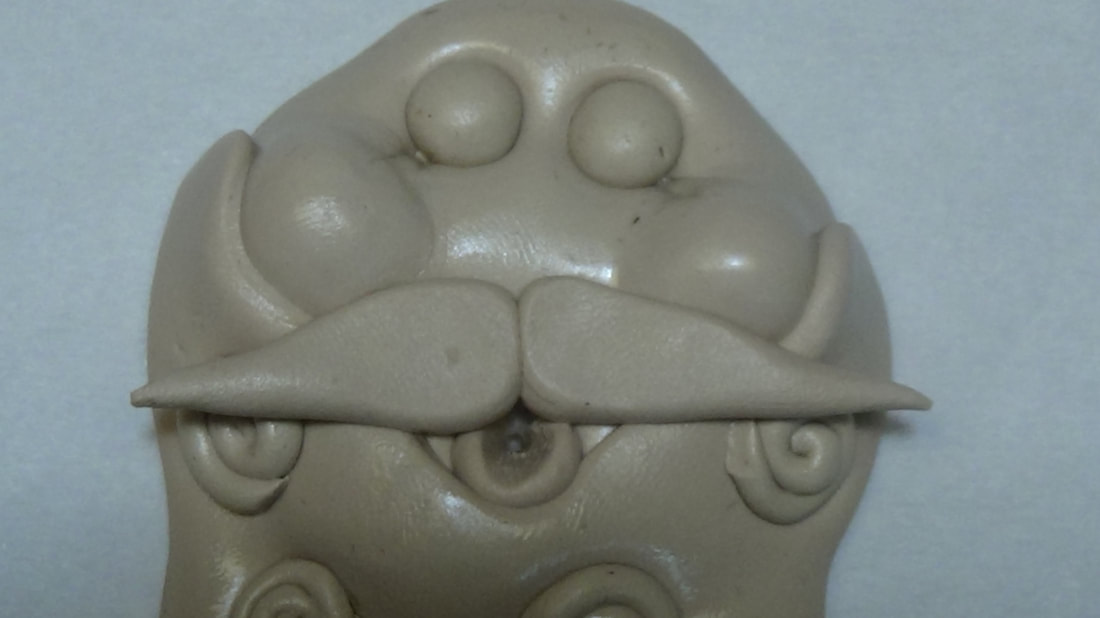
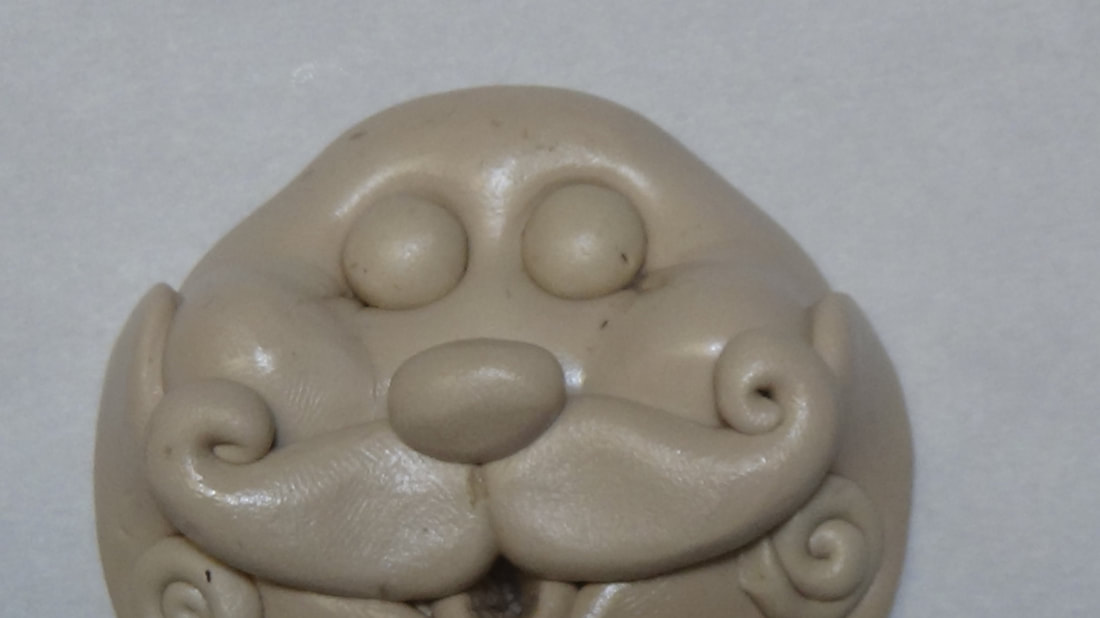
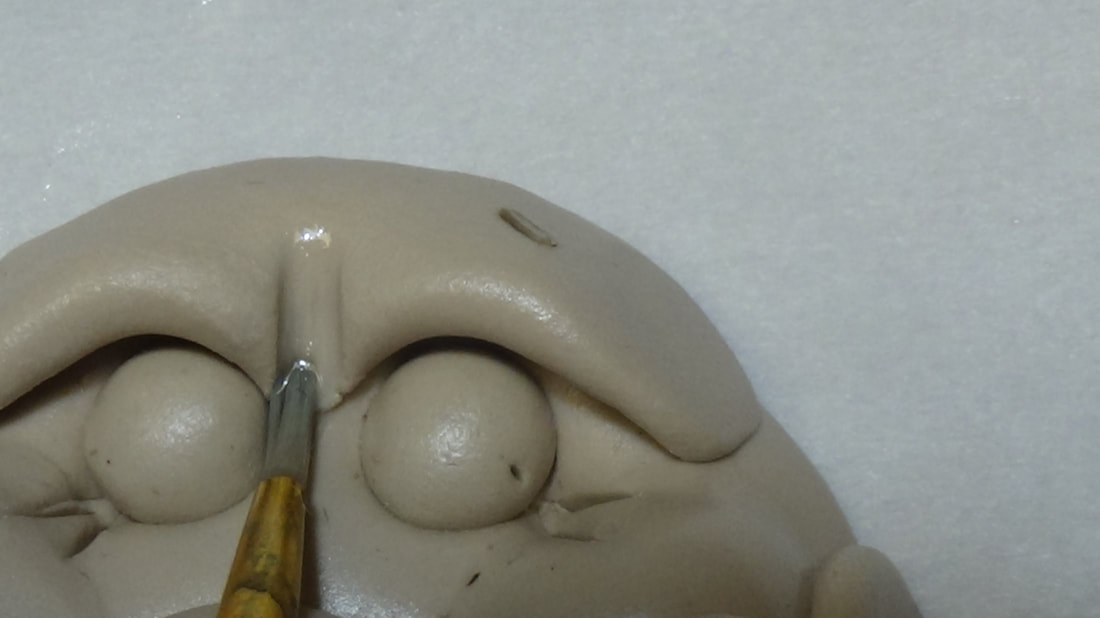
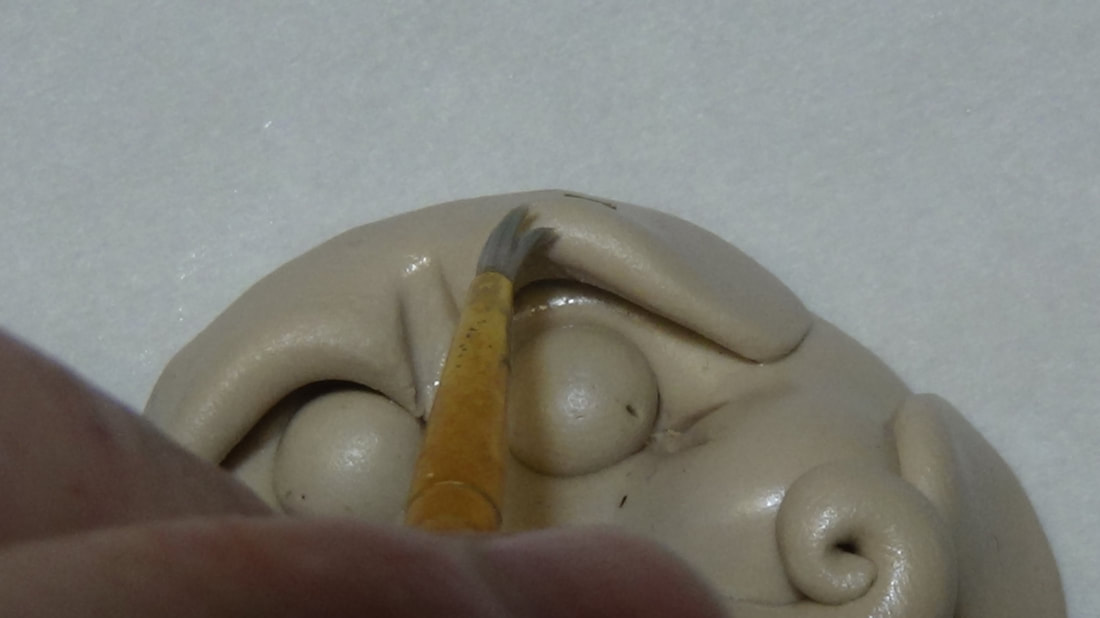
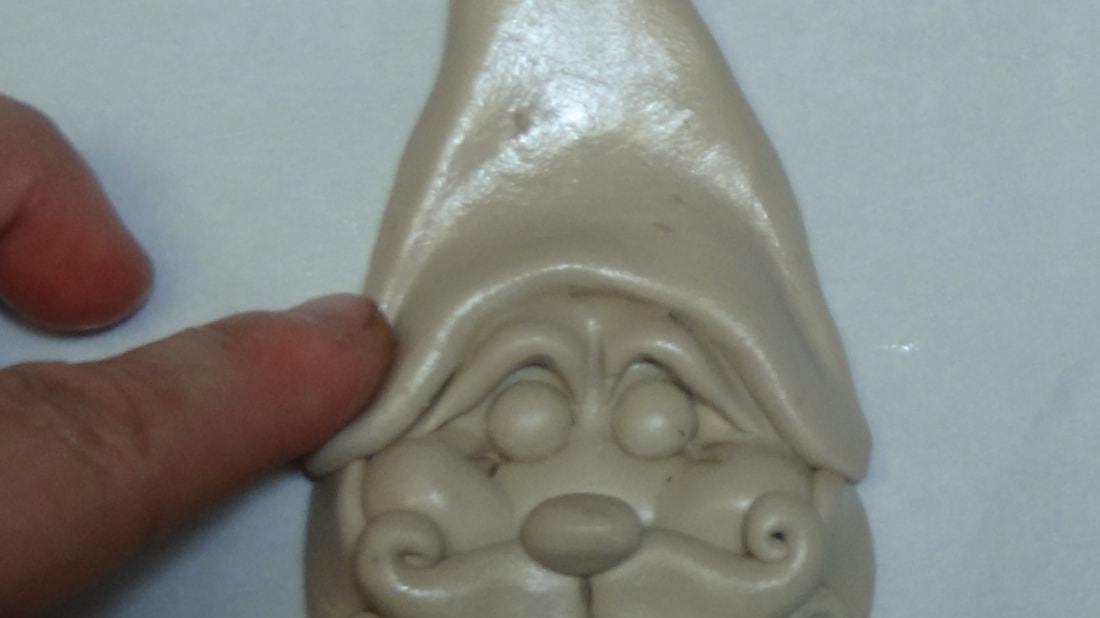
Eyebrows- Slice a sliver of quikwood, knead and prepare. Roll into a 1" cone and flatten slightly. Lay over tops (ONLY) of eyes and down the sides, Use a dab of extender to blend the back only. Using a old paint brush , dip it in a dab of extender and press between the eyes to create the separation between the eyes and smooth with the brush any creases. Use the brush to keep the lids lifted up and off the eyes. (You don't want a mean looking Santa).
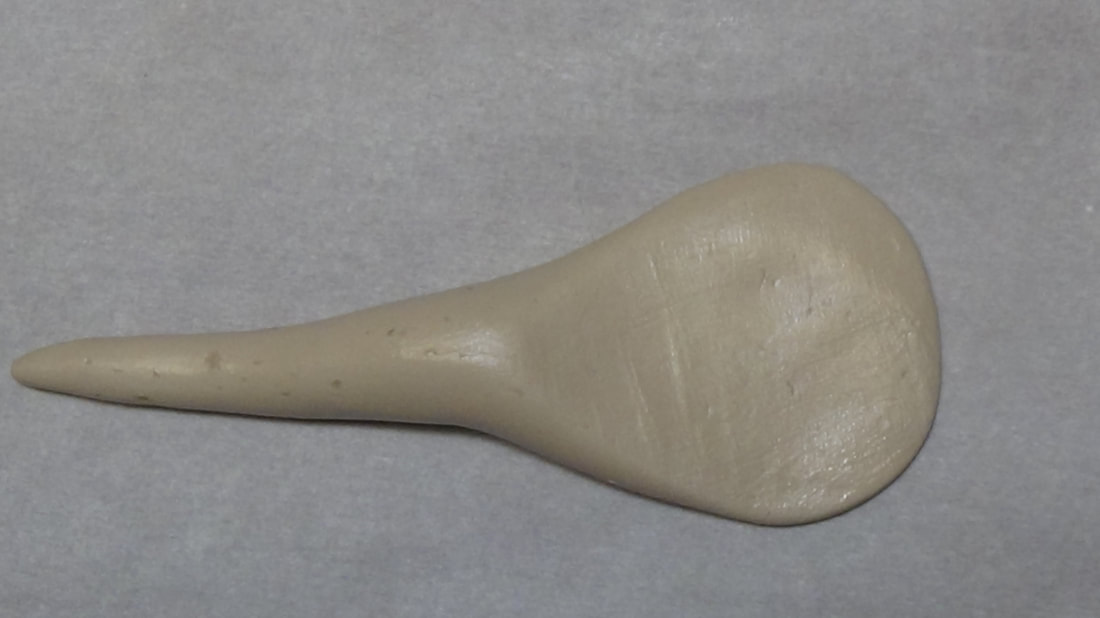
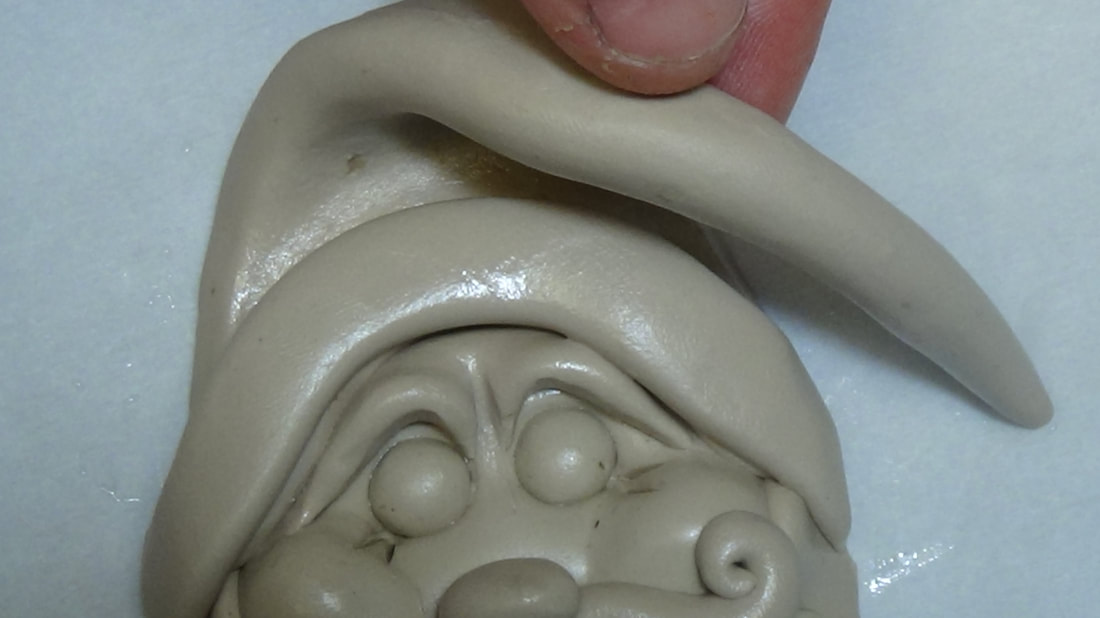
Beard- Slice 1 1/2" of quikwood, knead and prepare. Roll into a 4" cone and flatten slightly the wider end ONLY. Just like the beard push in the center and pull the side up gradually , place over the top of the head and down the side to meet the beard.
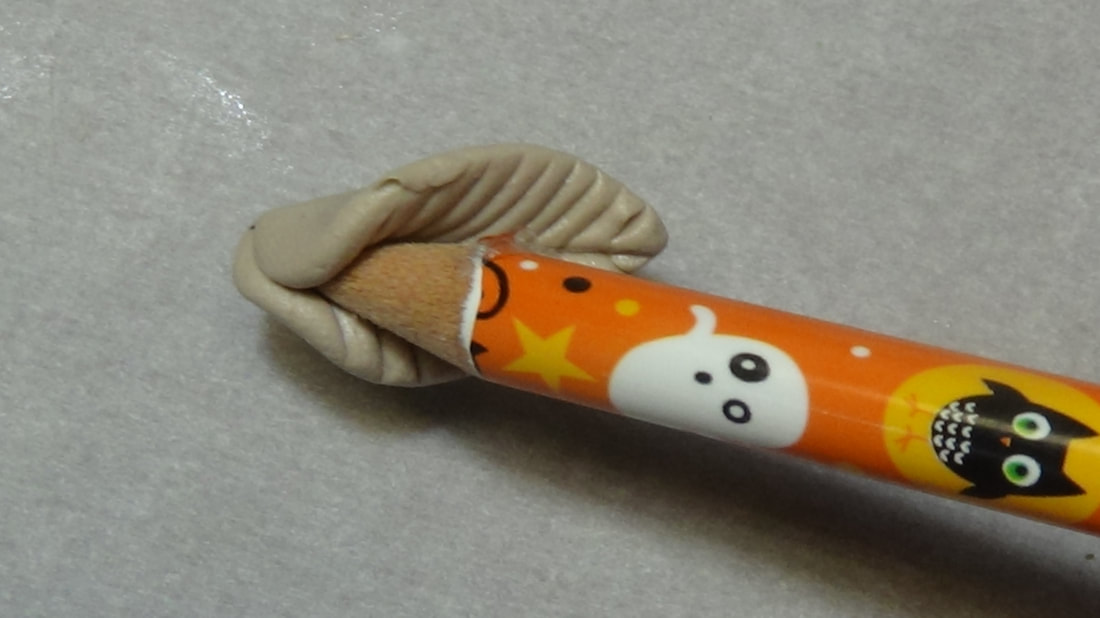
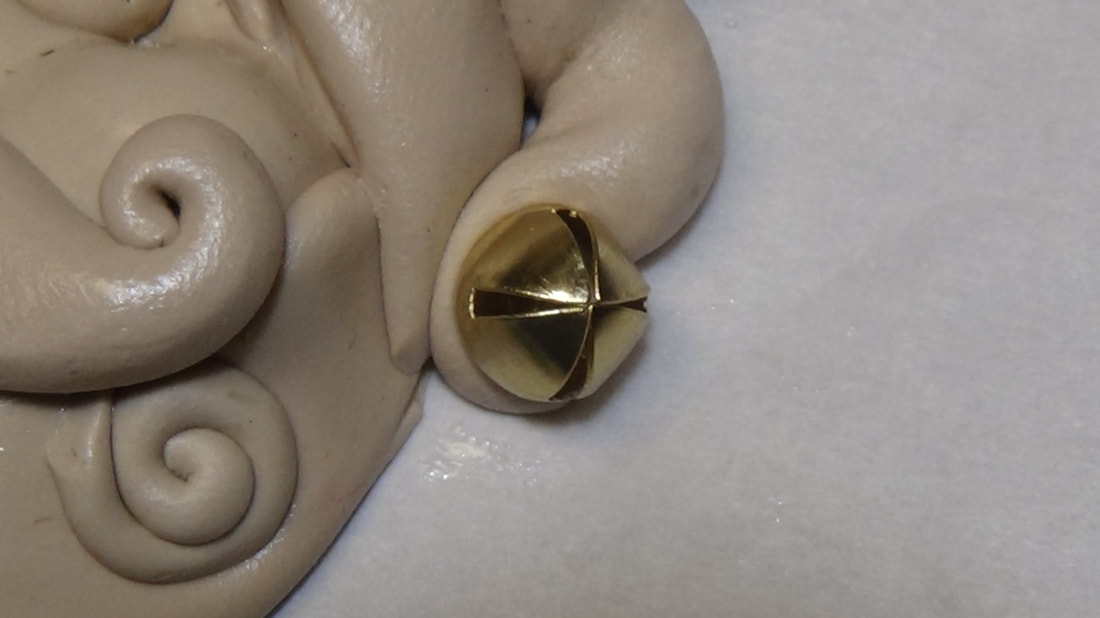
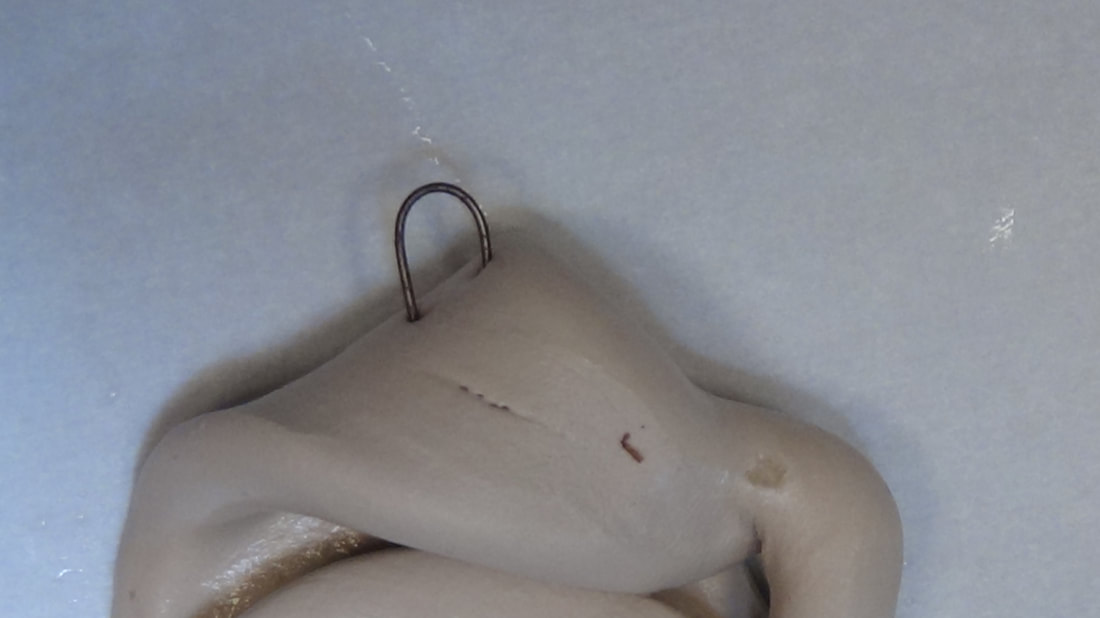
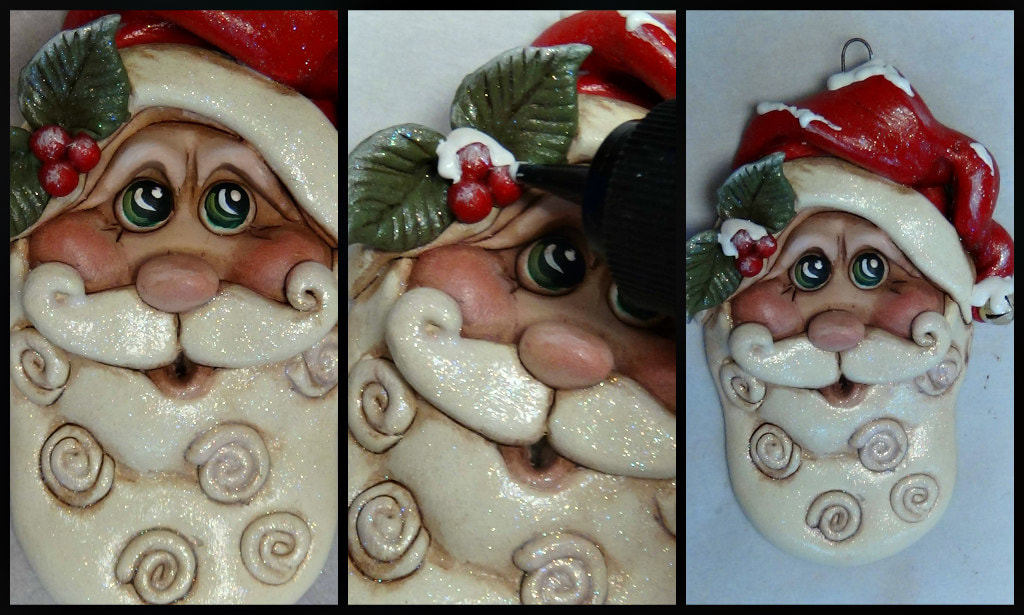
Hat Band- Use the remainder 1" (If you measured correctly lol) knead and prepare. Roll into a 4" cone and flatten slightly. Place over the joining hat and head and trim the sides. Fold the hat down the right side and begin twisting. Insert the jingle bell in the tip. Insert the 1 1/2" piece of wire into the top of the hat for the hanger. Insert the CURED leaves and berries on the left side of the hat band. Let everything cure 20-30 minutes before painting.
Painting Instructions: Paint the face, nose and lip with 3 coats of warm beige (Flesh). Yes I painted over the eyes as it is easier to cut in the white. Paint the eyes with (3) coats of white. Paint the Light Buttermilk on the beard, mustache and hat band.
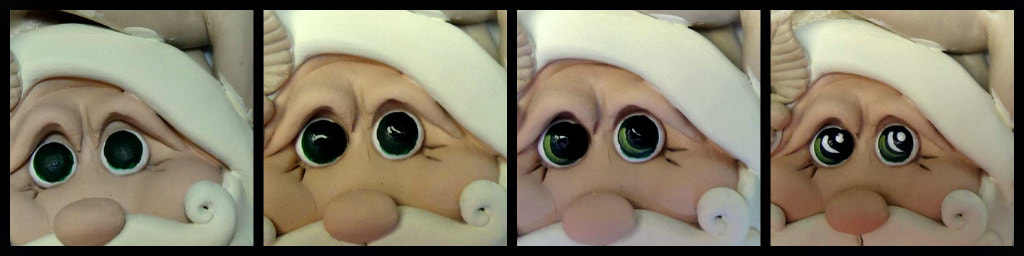
Paint Forest Green in the center of the eyes and let dry, paint black on the top right of each eye and let dry. highlight the left outer edge of each eye with Light Hauser Green , dot each eye on the top right center with white and a small highlight off to the left of the dot. Let dry!
Paint Primary Red (3) coats on the hat and the berries. Paint (2) coats of Light Avocado on the leaves.
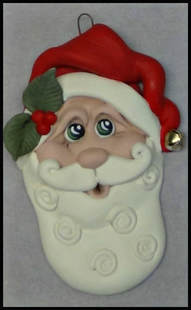
Antiquing- I usually water down my antiquing and cover all painted areas. Using a baby wipe, dab (DO NOT RUB) off the excess antiquing, leaving in where you want it, especially in all the cracks and crevices. It is a personal preference on how dark or light you antique, but remember it is easier to put on then take off. (DO NOT BE A RUBBER! you will rub off your paint!)
Blush- I like using Dollar store make-up blush and using a old brush or your finger brush a little on the nose, cheeks and lip to give him a rosy glow.
Dry Brushing- I like using an old chip brush. Dab brush in White paint, and brush off excess onto a paper towel. Highlight the top of the hat, leaves and any where you may want to add a few highlights. Let dry
Brush Glamour dust on the beard, mustache, hat and leaves. The only part I didn't add the shimmer was his face. I wanted him to be sparkly! To add a touch of snow, use your snow writer, You have more control to add a little here and there. Once he is dry and cured you can the give him a spray of poly-acrylic semi-gloss spray.
DecoArt Give Away Comment to Win !!!
DecoArt is providing the DecoArt products used in this project to one lucky winner. To enter to be a part of this giveaway, comment on this blog post. I will select the winner on November 3rd. Each artist in this blog hop will also be offering the DecoArt Give Away, so check them out using the links below.
DecoArt is providing the DecoArt products used in this project to one lucky winner. To enter to be a part of this giveaway, comment on this blog post. I will select the winner on November 3rd. Each artist in this blog hop will also be offering the DecoArt Give Away, so check them out using the links below.
Ornament Exchange 2017
Day 1 – October 17th
Day 1 – October 17th
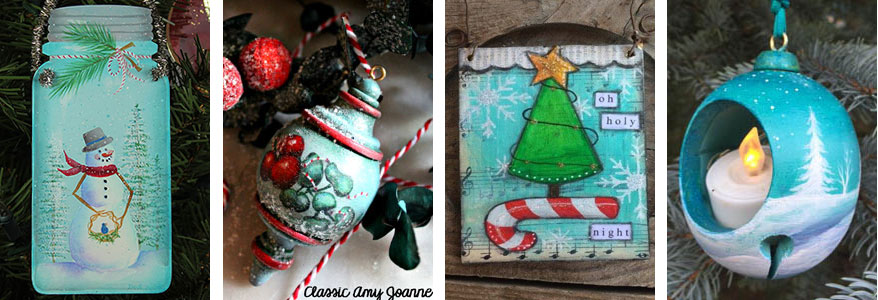
Jane Allen Creates Amy Mogish Franca Marzi Judy Westegard – Jenkins
Day !
Day 2 – October 18th
Day !
- Jane Allen https://janeallencreates.blog/ornament-exchange-2017
- Amy Mogish https://classicamyjoanne.com/ornament-exchange-2017
- Franca Marzi http://piccolepassioni.blogspot.it
- Judy Westegaard-Jenkins https://judithwestegaarddesigns.wordpress.com/
Day 2 – October 18th

Golda Rader Debbie Mishima Tracy Moreau Linda Sharp, CDA
Day 2
Day 3 – October 19th
Day 2
- Golda Rader http://raderizms.blogspot.com/2017/10/ornament-exchange-2017.html
- Debbie Mishima https://debmishima1.wixsite.com/countryhearts/blog/ornament-exchange-17
- Tracy Moreau https://tracymoreaudesign.blogspot.ca/
- Linda Sharp, CDA http://www.lindasharpcda.com/ornament-exchange-2017/
Day 3 – October 19th
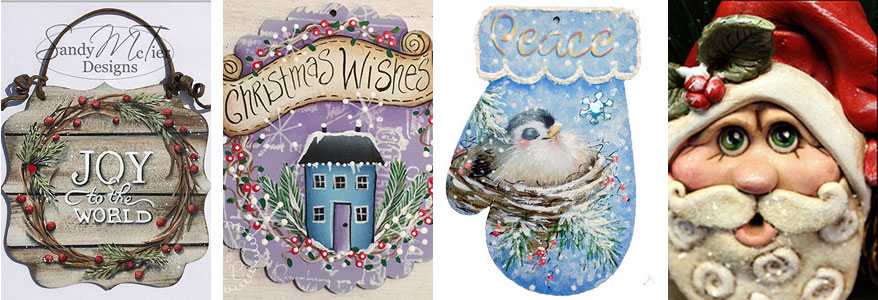
Sandy McTier Deb Antonick Laure Paillex Wendy Young
Day 3
I hope you enjoy this Blog Hop and are inspired to paint some ornaments. Please share your creations with us on FaceBook.
Special Thank you to DecoArt and Cupboard Distributing for sponsoring our blog hop.
Day 3
- Sandy McTier https://sandymctierdesigns.blogspot.com/2017/10/ornament-exchange-2017-blog-hop.html
- Deb Antonick http://www.paintingwithdeb.com/
- Laure Paillex https://www.laureart.com/blog/
- Wendy Young http://www.oldemoonlane.com/ornament-exchange-2017
I hope you enjoy this Blog Hop and are inspired to paint some ornaments. Please share your creations with us on FaceBook.
Special Thank you to DecoArt and Cupboard Distributing for sponsoring our blog hop.

If you like my creations please feel free to follow my other blog post, as I offer tips, tricks and happenings here at OldeMoonlane. You can also find my patterns as instant downloads in my etsy shop.
E-mail- [email protected]
Web-Site- www.oldemoonlane.com
Facebook- Https://www.facebook.com/OldeMoonlane/
Etsy: https://www.etsy.com/shop/OldMoonLanePrimitive
Blessings!
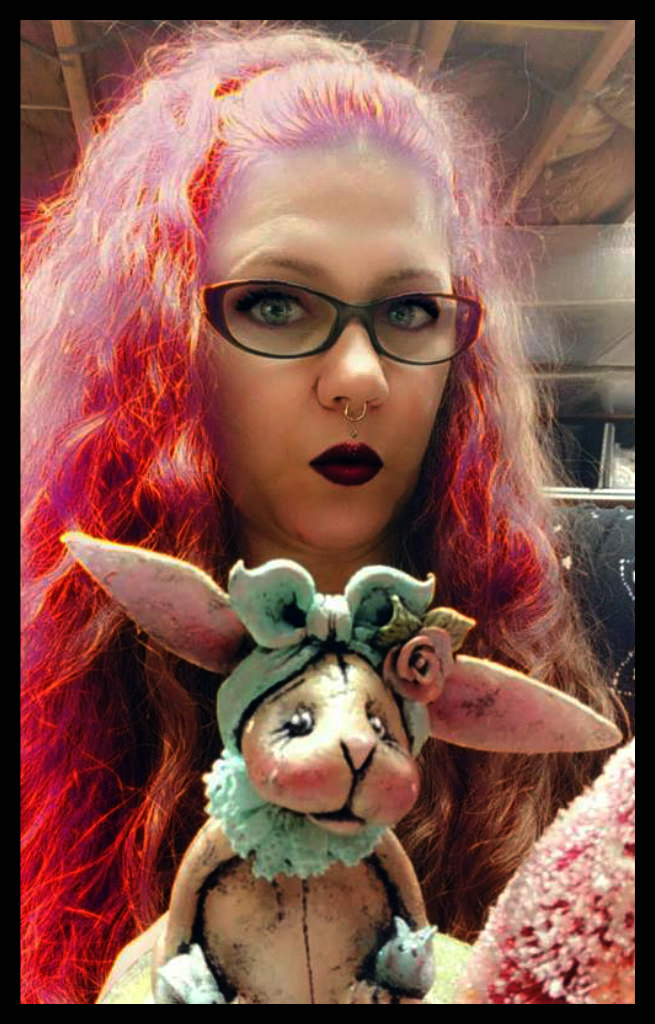
Wendy